
Introduction
We're all familiar with clothespins, but you only know they can be used to hang clothes. However, that's only 1% of their functionality!
Creativity always opens your eyes. Guess what the remaining 99% could be?
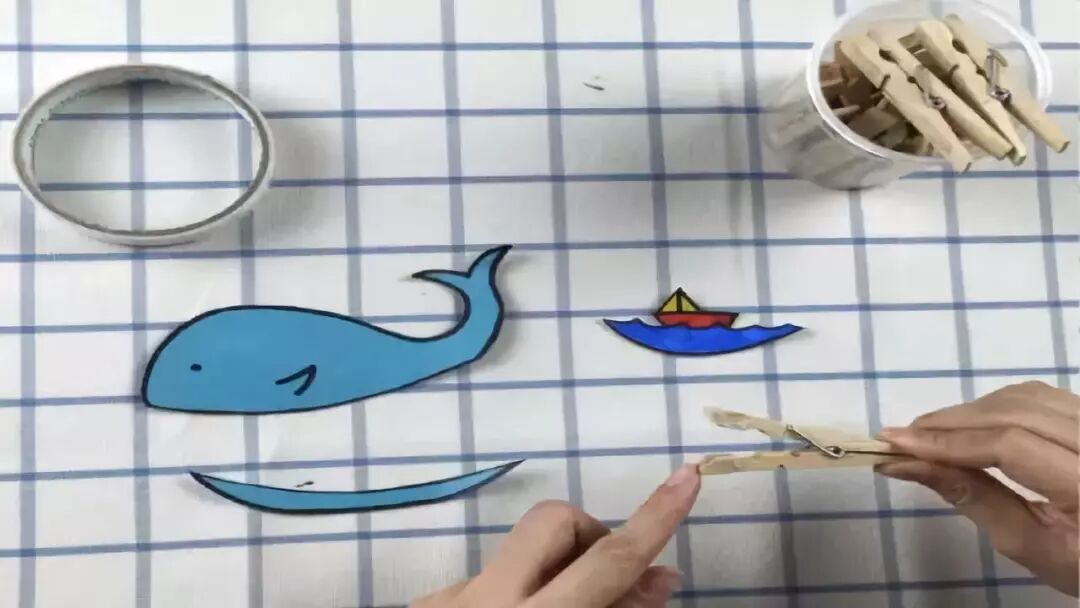
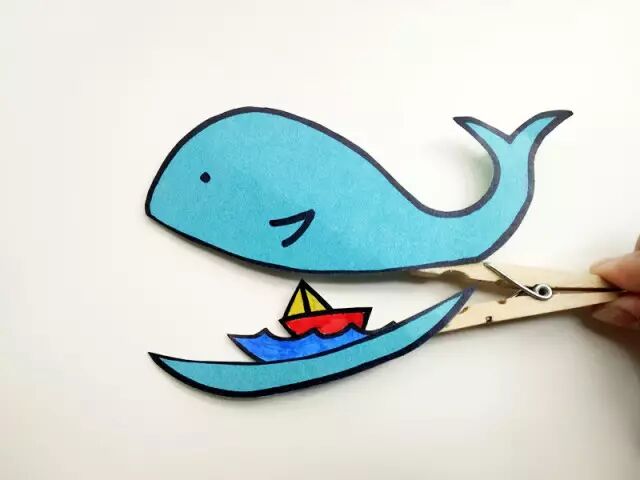
Whale with Open Mouth
Materials needed: Colored cardstock, colored pens, scissors, clothespins, double-sided tape.
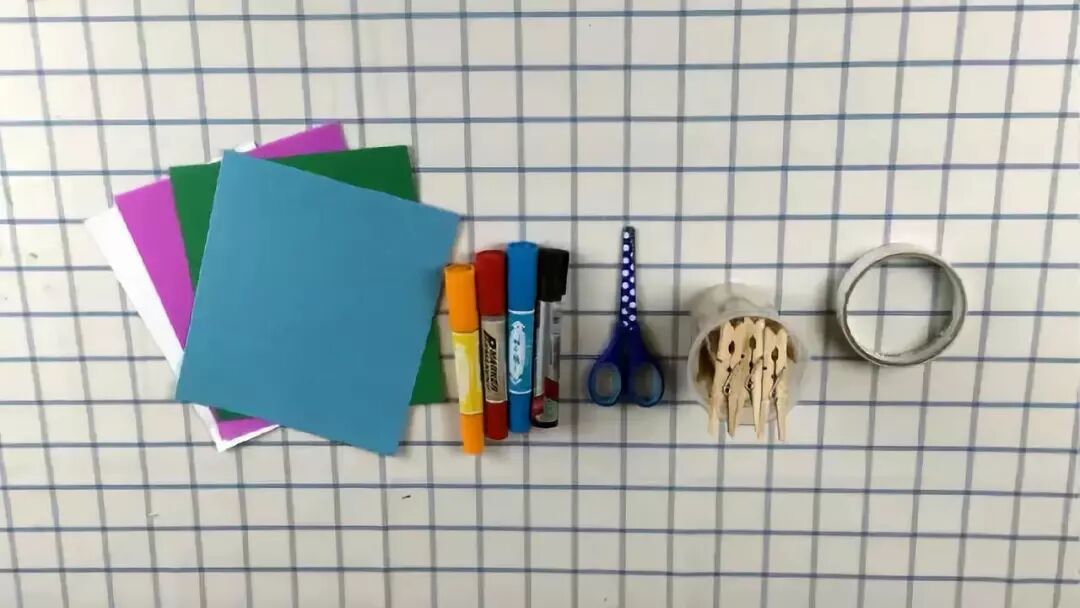
Instructions:
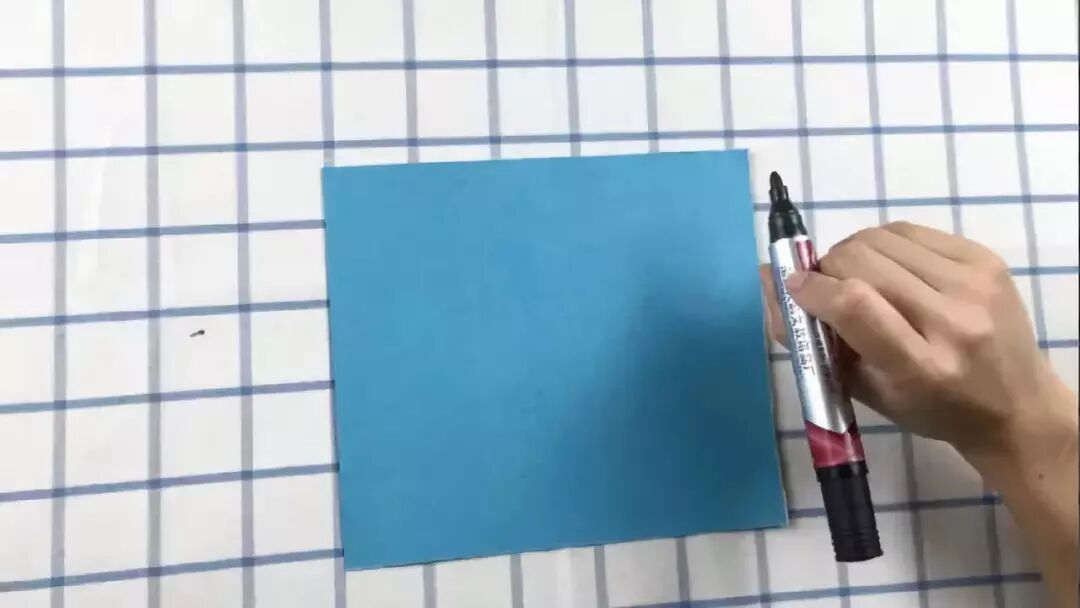
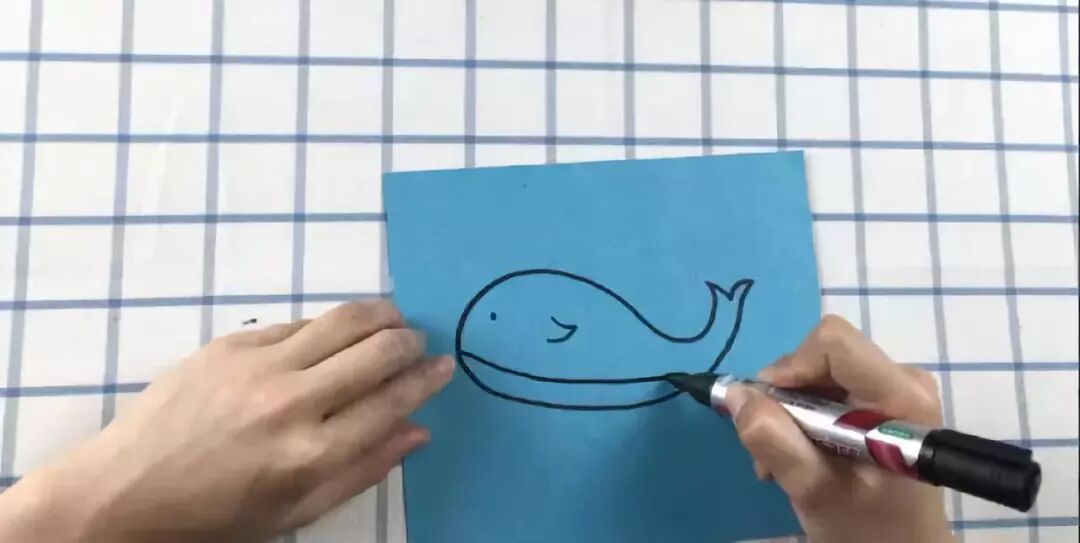
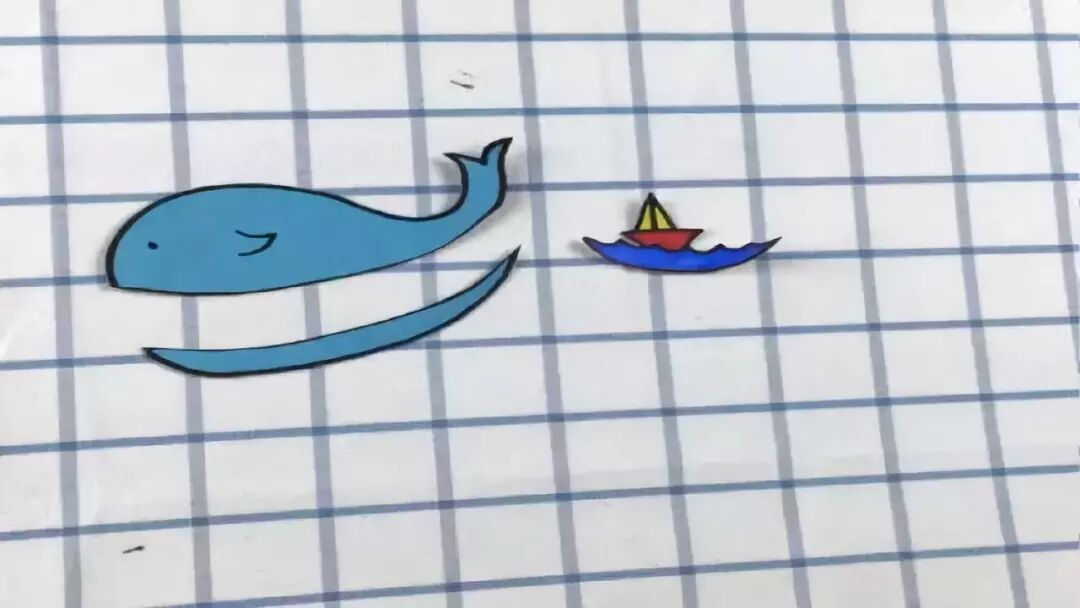
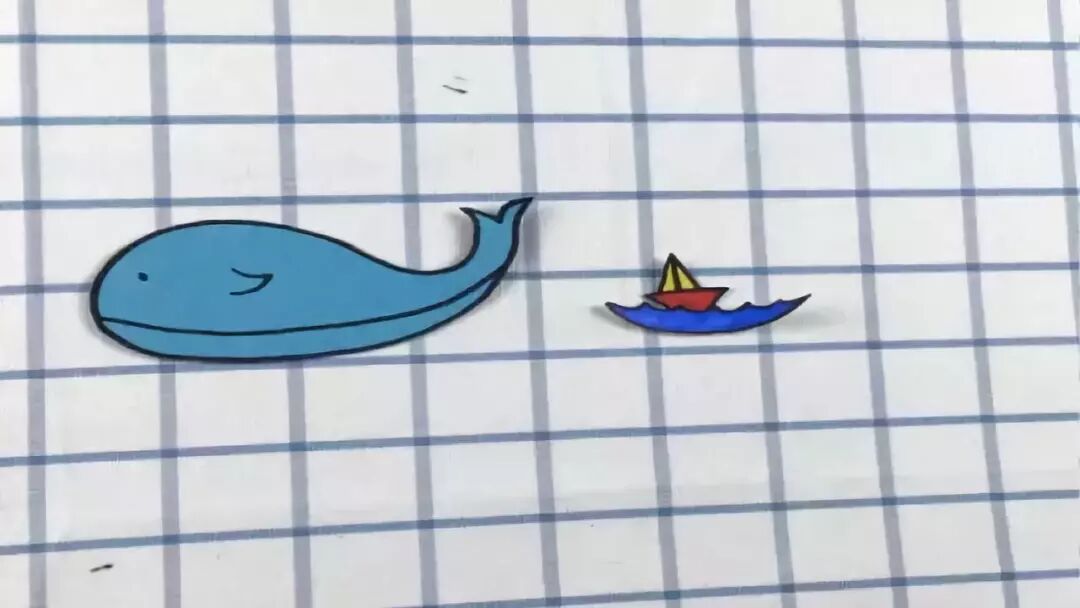
- Take blue cardstock and a black pen, draw the outline of a whale on the paper, then draw eyes and fins, and connect a line at the middle lower part of the whale's body.
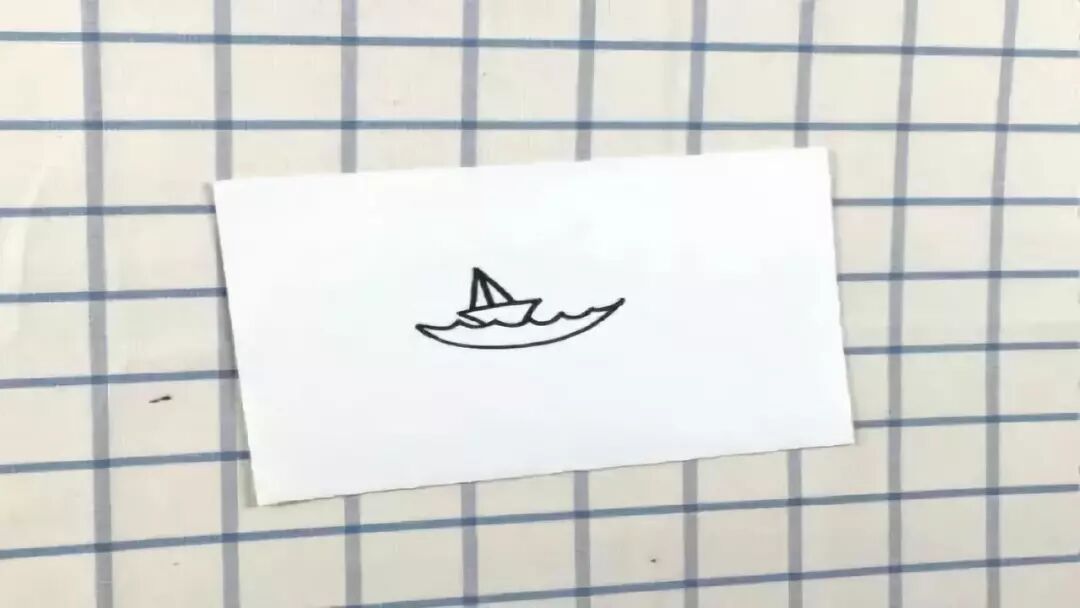
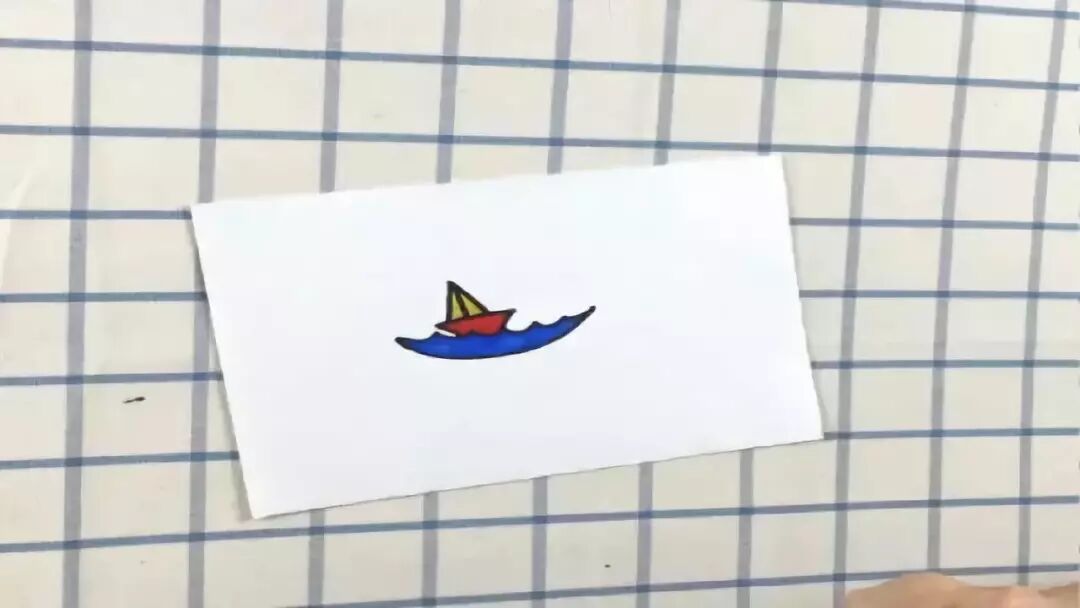
- Take white cardstock and a black pen, draw waves and sailboats on the cardstock, then color the waves. The sailboats must be drawn smaller than the whale because we'll put the sailboats inside the whale's belly later!
- Cut out the outlines of the whale and sailboats. Remember to cut out the line on the whale's belly.
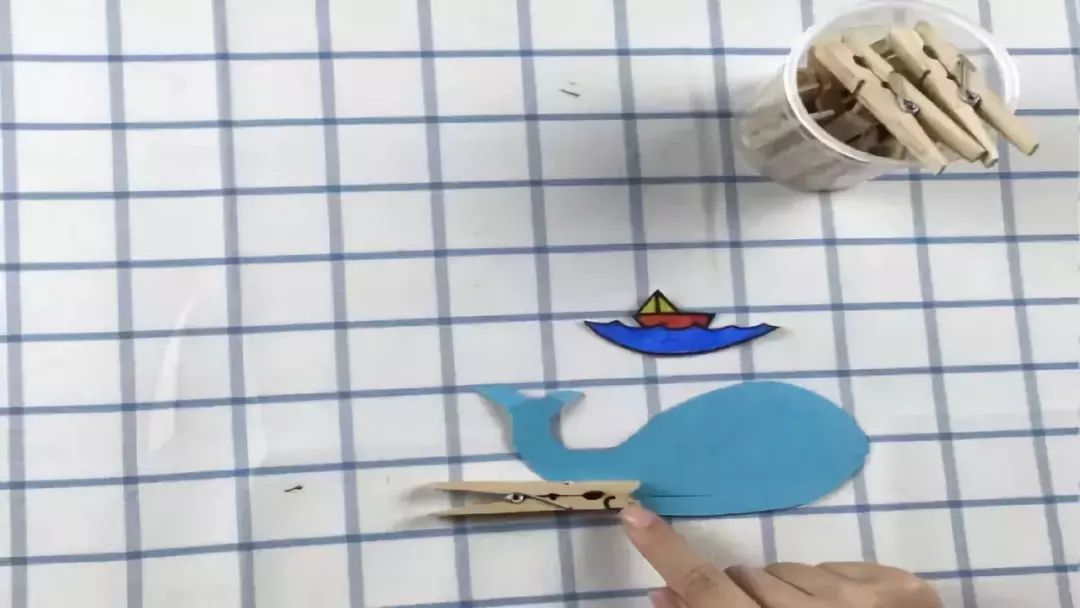
- Take the clothespin, stick double-sided tape on the front of the upper and lower ends of the clothespin. Take the whale, stick the upper part of the whale to the upper end of the clothespin, and stick the lower part of the whale to the lower end of the clothespin. Note that when sticking, you need to stick out the complete shape of the whale.
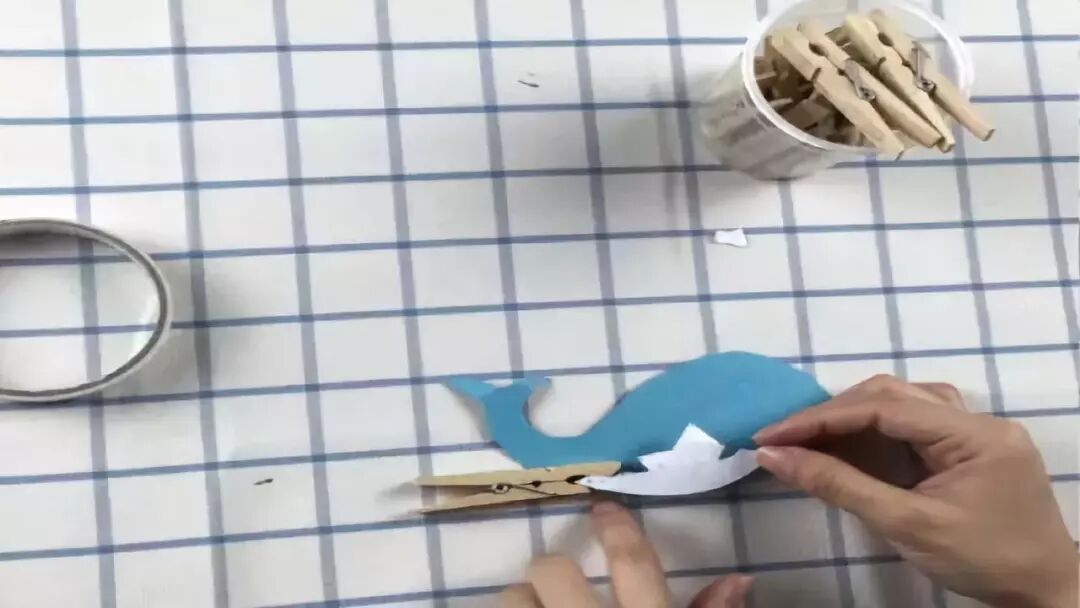
- Stick the back: After turning the clothespin over, stick double-sided tape on the lower end of the clothespin. Take the prepared sailboat, turn it over, and note that when sticking, the bottom of the sailboat should not expose the outline of the whale.
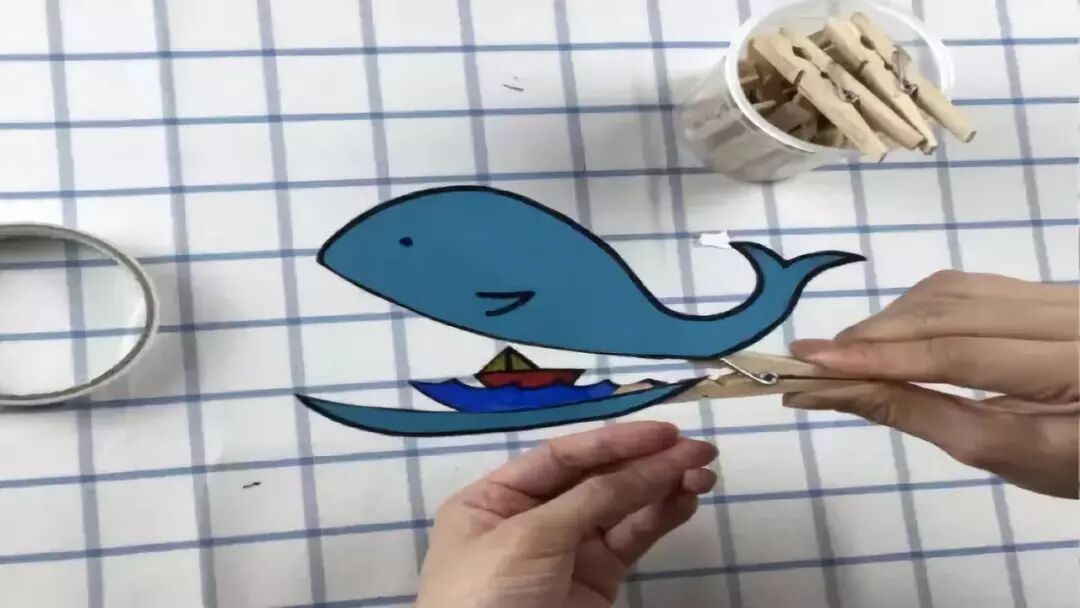
- Look! Our movable clothespin whale is done. In addition to whales, we can also make broken eggs, mysterious gift boxes. Kids! Do you have better ideas? Let's get started!

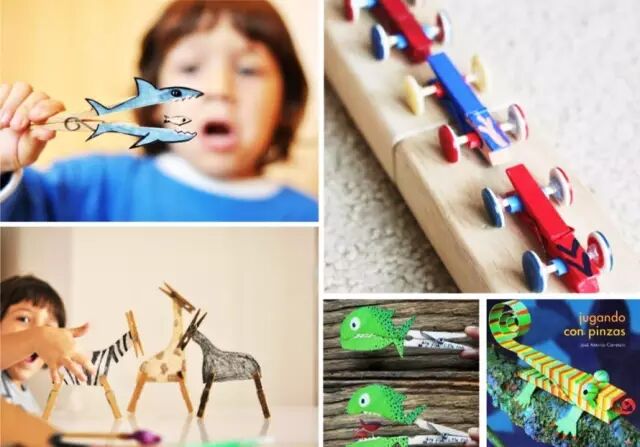
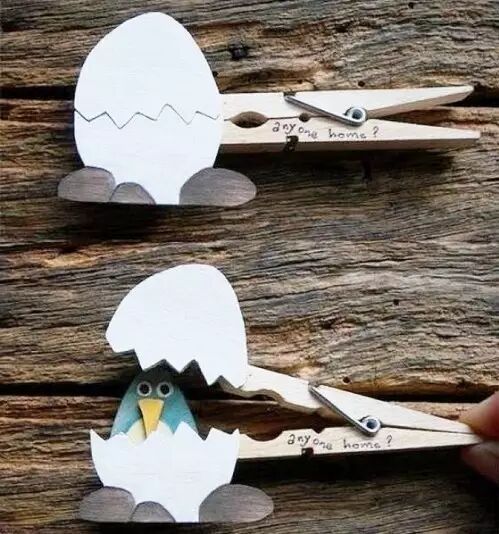
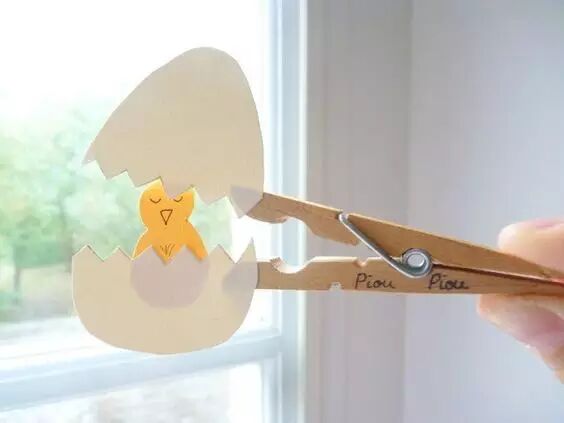
Various Animals with Open Mouths

Wow~ A collection of small toys that open their mouths! Let's take a look at their individual styles~
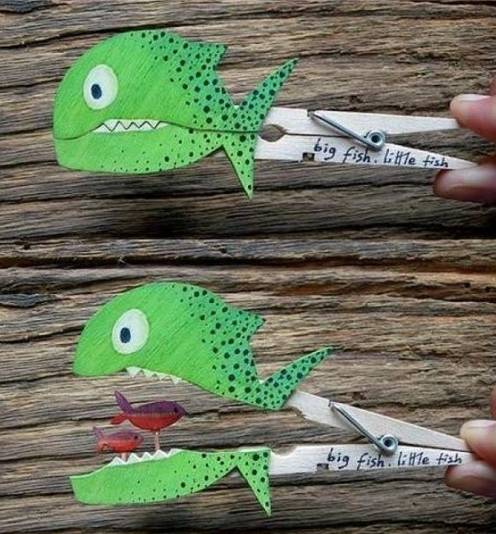
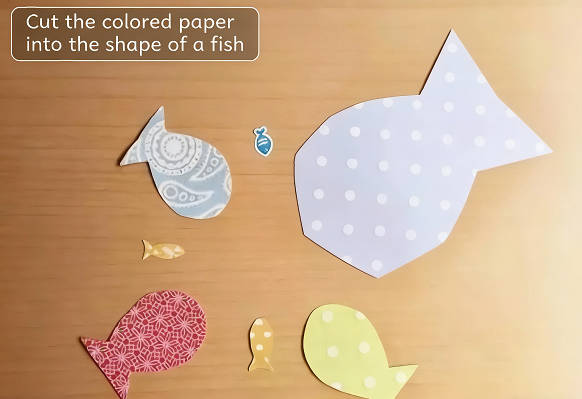
- A big fish opens its mouth to eat a small fish. Can the small fish escape?
- Animals breaking out of their shells are so cute~
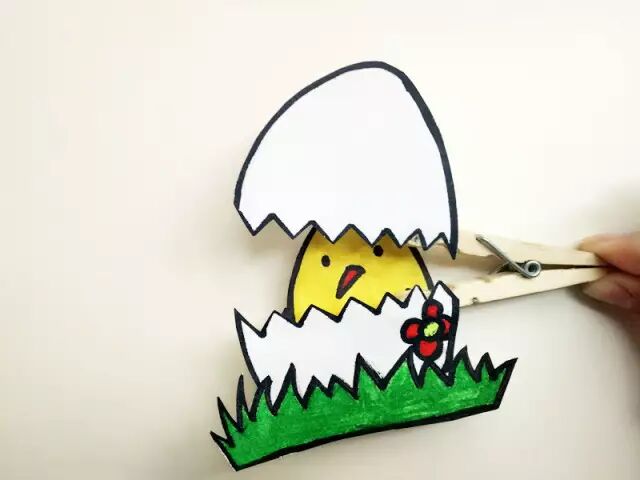
- In the morning, a chick is hatched from its egg~
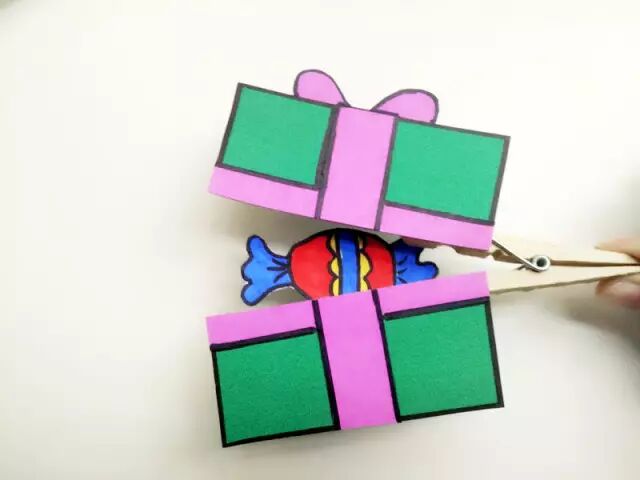
- Ta-da~ When the gift box is opened, a surprise is revealed!
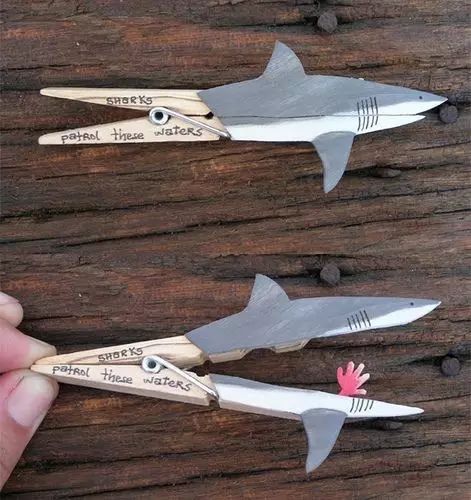
- Sharks are the most ferocious fish in the ocean!
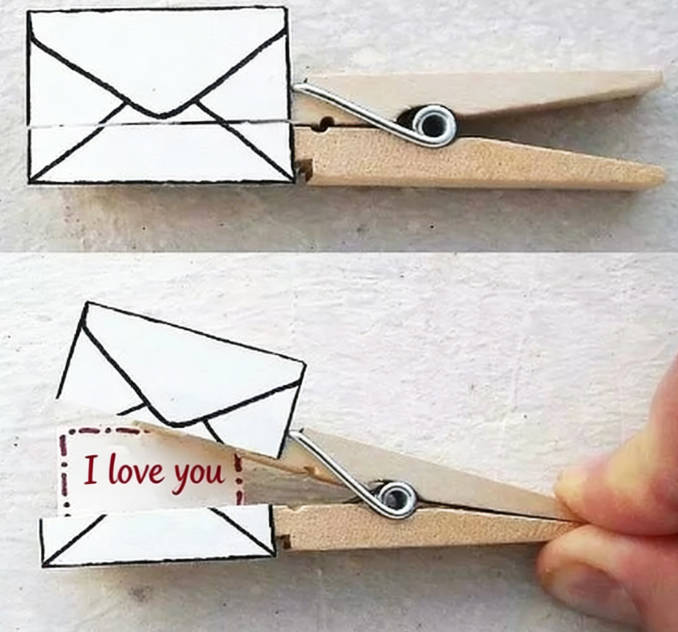
- If you want to write some words to your parents creatively, why not give them a surprise like this?
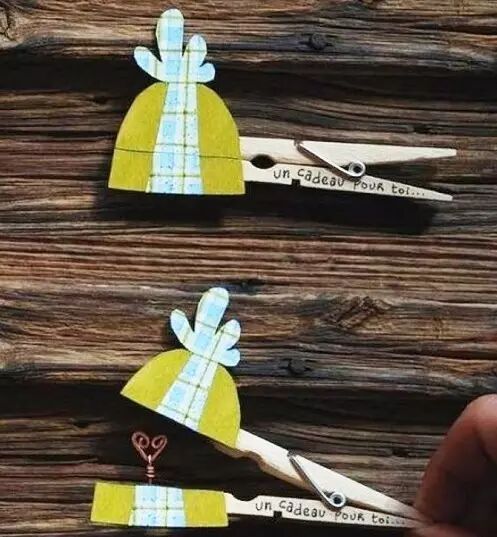
After seeing such interesting gameplay, here comes the tutorial~
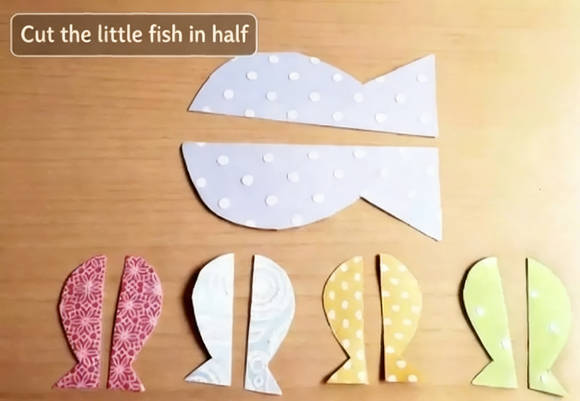
Glue the two halves of the big fish to the head of the clothespin, and use a small strip to support the small fish and stick it inside~
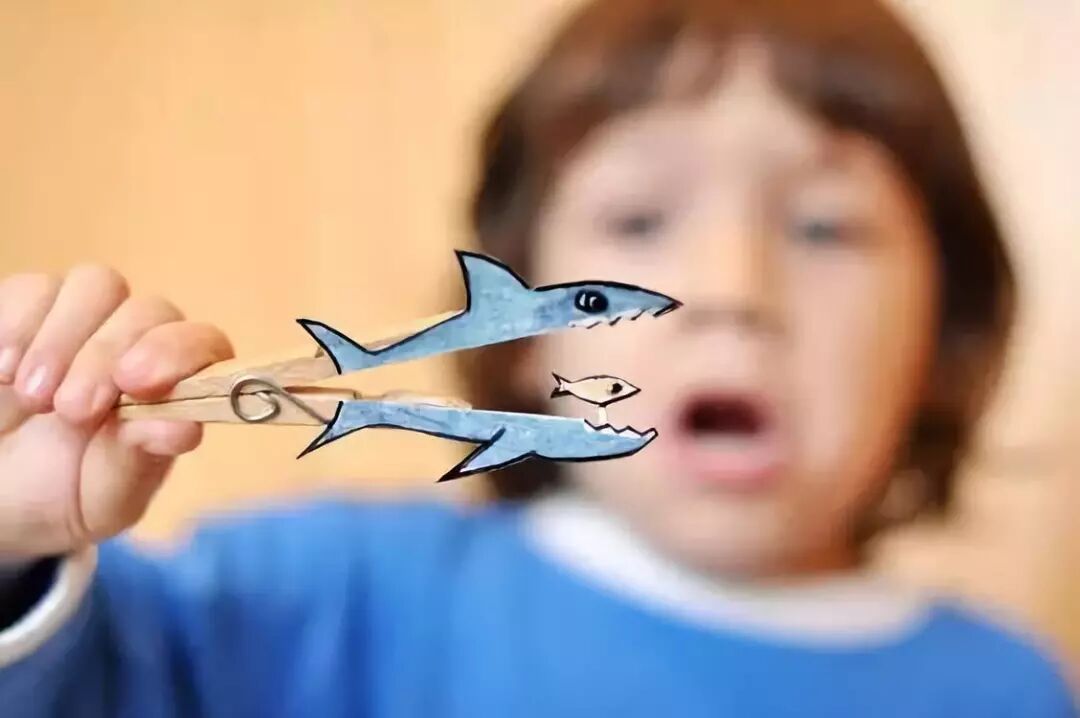
When the clothespin is opened, the shark has the visual effect of eating the small fish! Children will have a lot of fun playing with it~
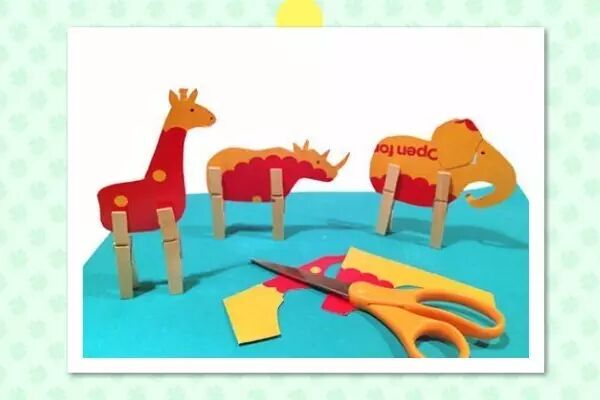
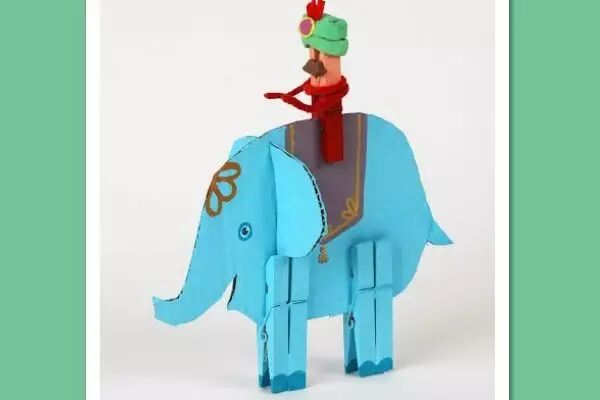
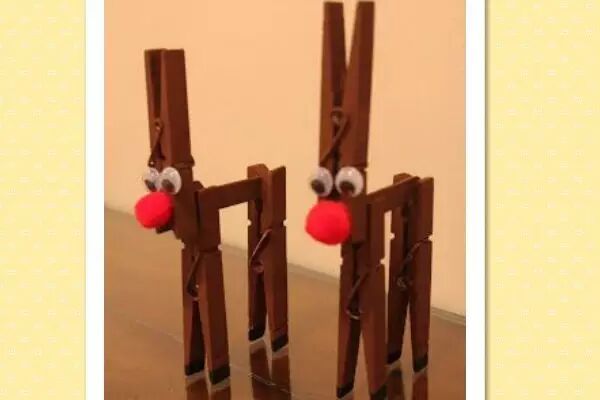
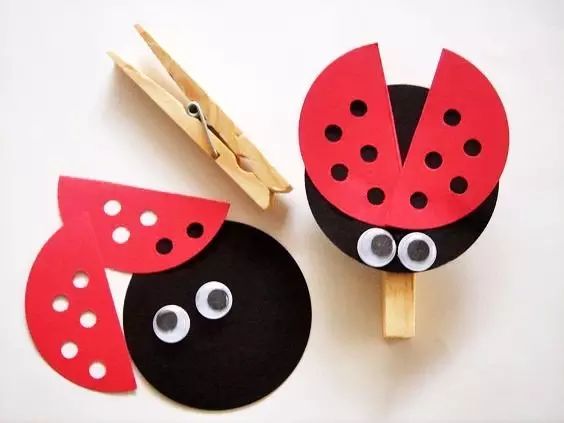
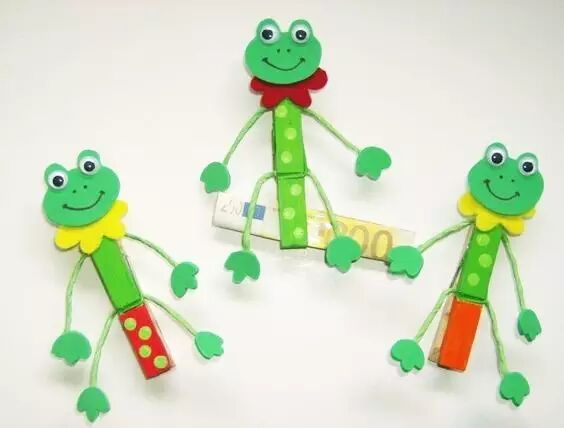
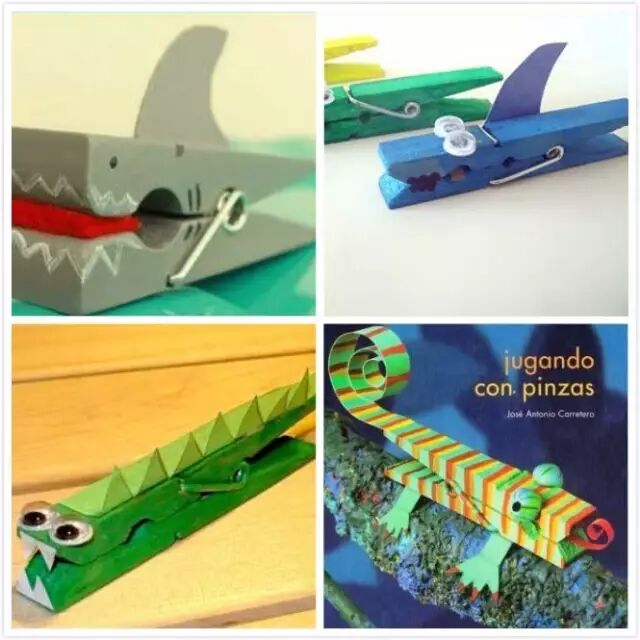
Unique Dolls

Children must have many dolls. This kind of unique standing doll will also be very fun~

- First draw the doll's body on cardstock or colored paper. This step is not difficult~
- Then use clothespins as the animal's feet, and they can stand up!
- The little person on the elephant is also made of clothespins. Just decorate it with some clay to form it~
- Is this a deer or a dog? Let children use their imagination freely~
- The little ladybug is out again~ It's simple to make and fun, so make one quickly~
- The little frog looks complicated, but it's not difficult to make~ This is the time to test children's drawing skills~
- With just cardstock and paint, simple sharks, snakes, and chameleons can also be made~
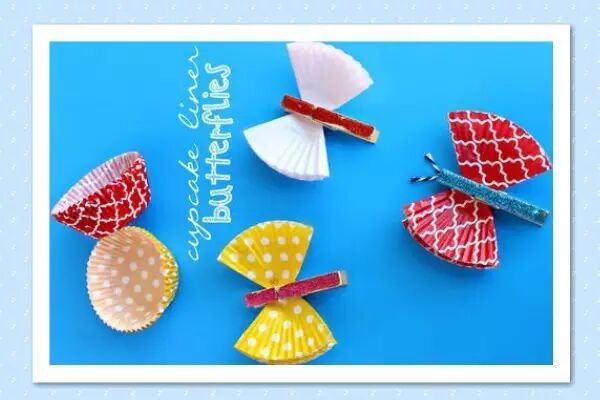
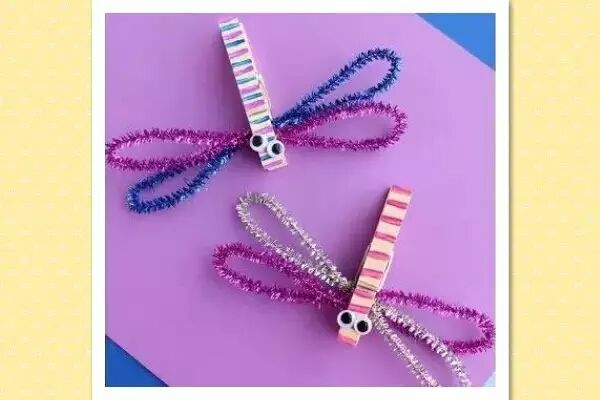
Butterflies and Dragonflies
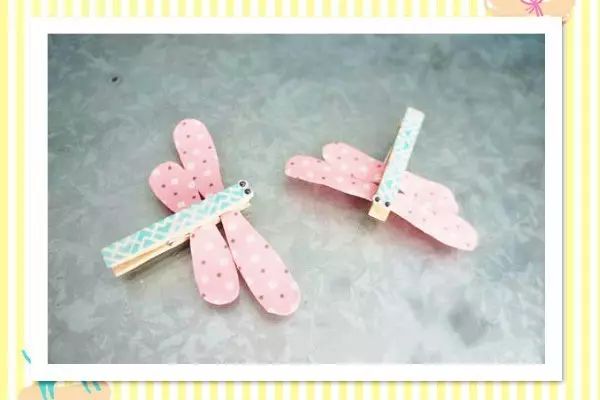
Beautiful butterflies fly everywhere. Let's make one~

- We can first stick tape on the clothespin to decorate it~
- Using cardstock or cookie paper plates to make butterfly wings can be very beautiful~
- Little dragonflies are made the same way, just with different wing shapes!
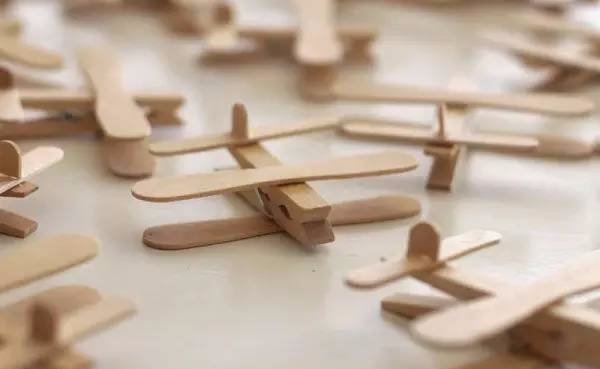
Clothespin Airplane Models
Wooden Clothespin Airplane Model 1
A decent mini airplane model toy that can be easily DIYed with just a few popsicle sticks and a wooden clothespin. Parents who are worrying about what kind of eco-friendly toys to prepare for their children, come and see~~~ You can call your little ones to make it together and enjoy a happy parent-child time~~~
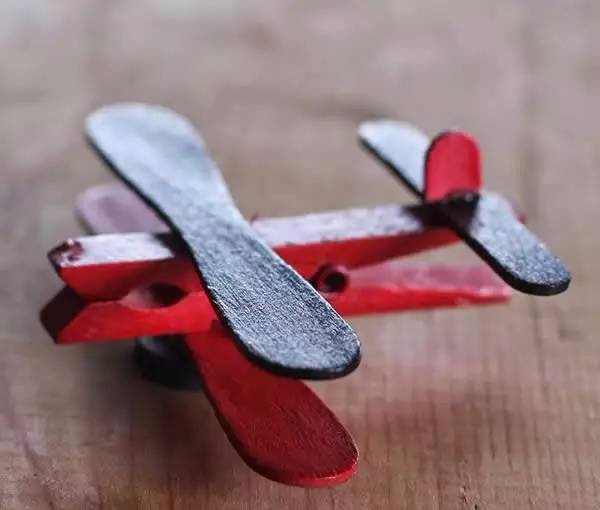
The appearance of the completed model airplane
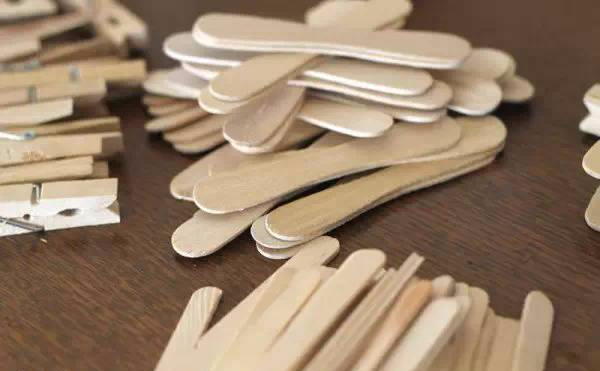
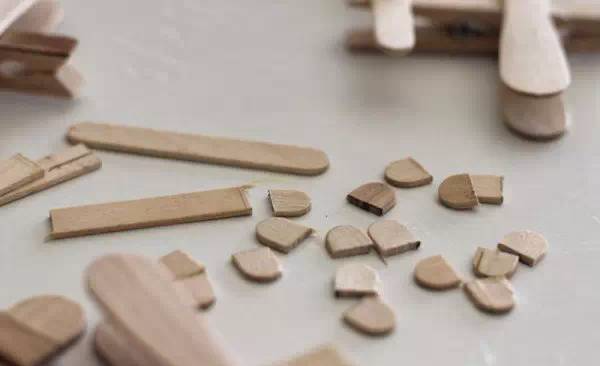
Materials needed: Wooden clothespin, short and long popsicle sticks, some paint, paintbrushes, glue or glue stick
Instructions:
- Clean the popsicle sticks and let them dry.
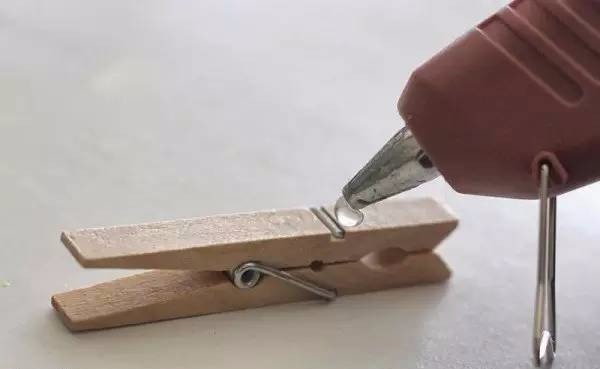
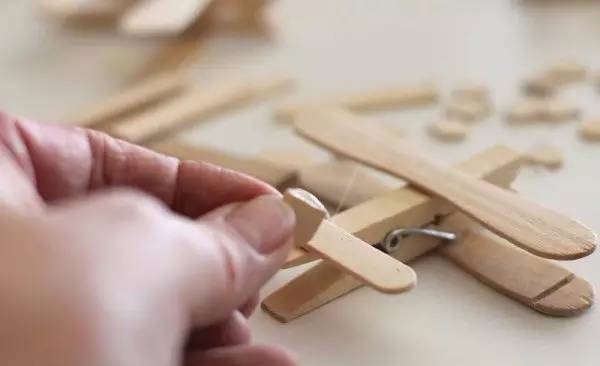
- Put hot glue on the left and right sides of the metal wire at the front of the wooden clothespin.
- Press the popsicle stick onto the hot glue to fix it as the front wing of the airplane model.
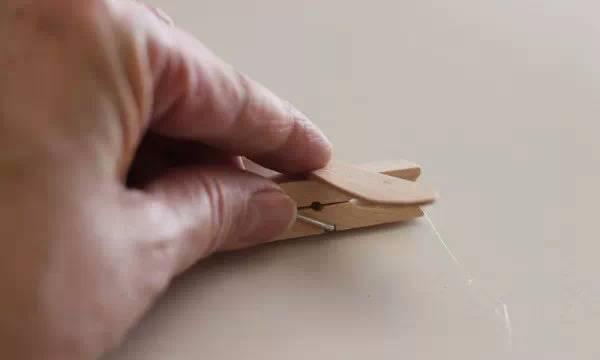
- The appearance after sticking
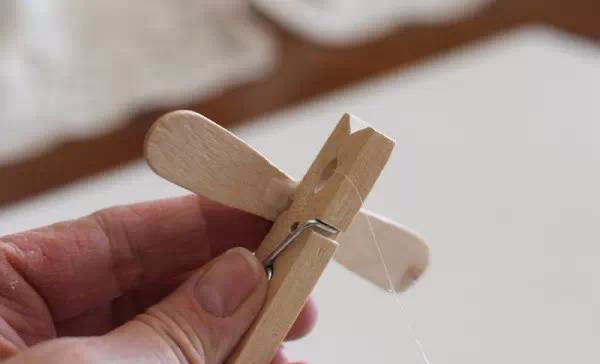
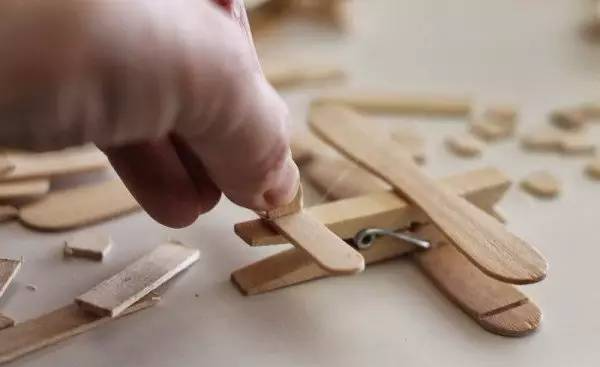
- Put hot glue on the reverse side of the clothespin as well.
- Fix another popsicle stick onto it, making sure it aligns with the wing on the other side.
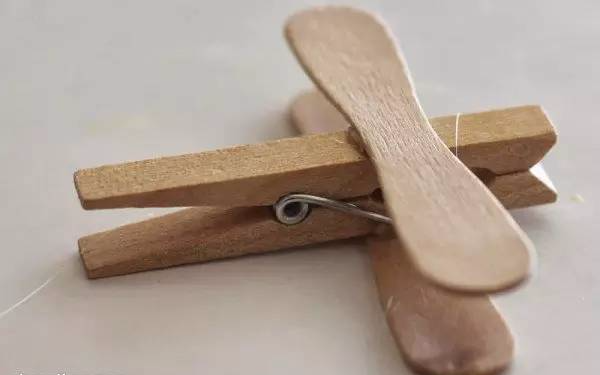
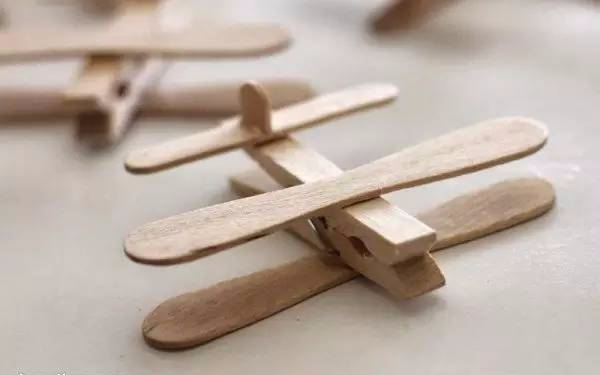
- Put hot glue on the tail of the wooden clothespin and stick a slightly shorter popsicle stick onto it.
- Cut off the round heads on both sides of the popsicle stick.
- Put hot glue on the cut part of the popsicle stick round head and stick it to the tail wing.
- Hold it for a while to ensure the round head is secure.
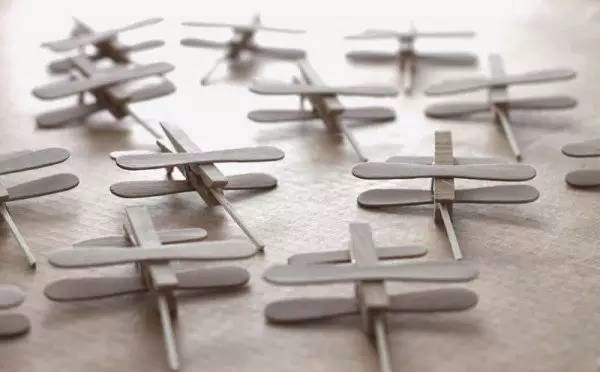
- A mini airplane toy model is completed.


If children want to demonstrate air combat scenes, make more small airplanes.
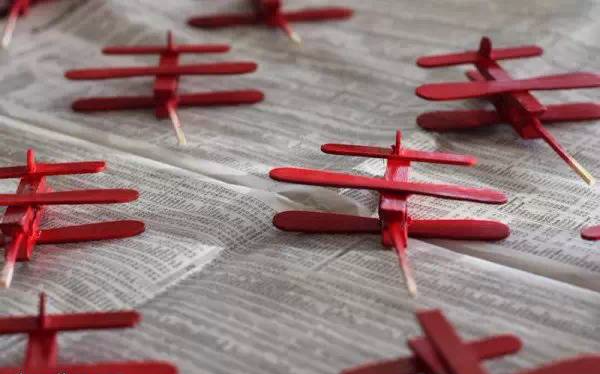
If you think the color is too monotonous, you can also paint the small airplane. Use a wooden clothespin to clamp a bamboo skewer or disposable chopstick, which is convenient for holding when painting.
Simple Wooden Clothespin Airplane Model 2
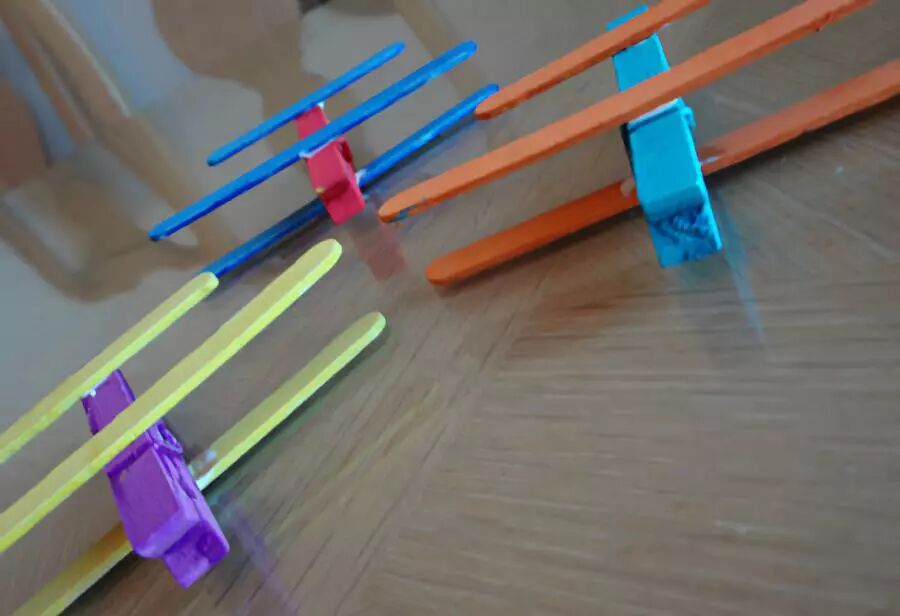
Increase children's creativity, and it takes a short time, so children won't lose interest in doing crafts. If you have a child who is eager to create, come and see the production method of this interesting colorful small airplane!
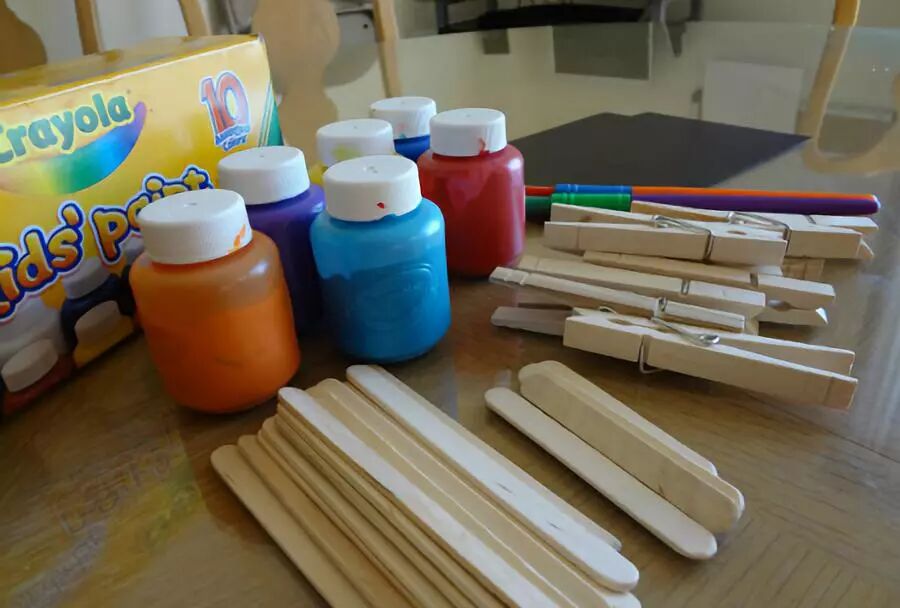
Materials needed: Wooden clothespin, short and long popsicle sticks, some paint, paintbrushes, glue or glue stick

Instructions:
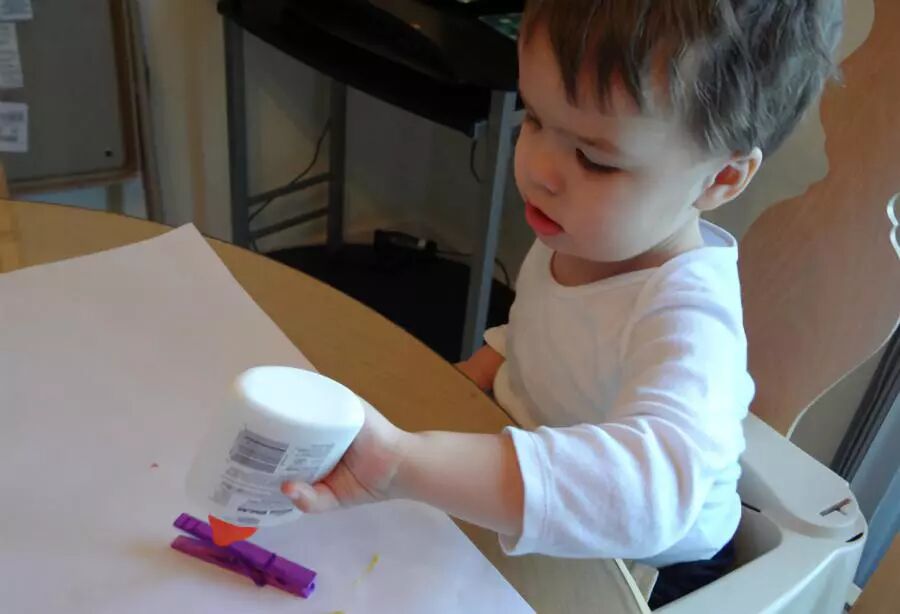
- There are two ways to paint. Let older children paint their own colors, and for younger children, we can help them paint some bright colors. Remember to paint different colors and tell them. After painting, let it dry aside.
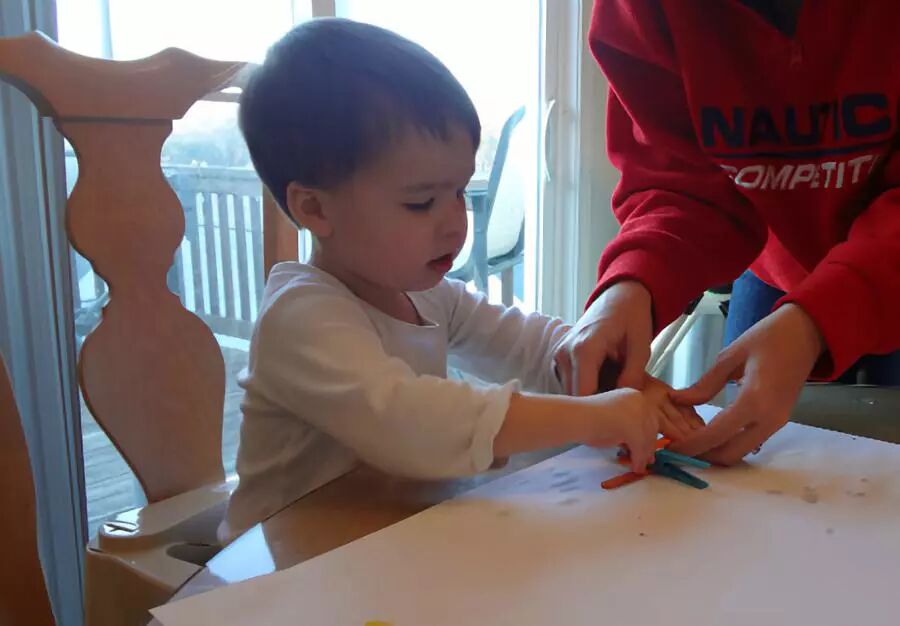
- Once the paint is dry, let's assemble the airplane. Let the child help you apply glue to the airplane body.
- Stick two long popsicle sticks on both sides of the metal part of the small clothespin, and then stick a short one on the bottom of one side. Let the child do it together, so they can know the simple structure of the airplane.
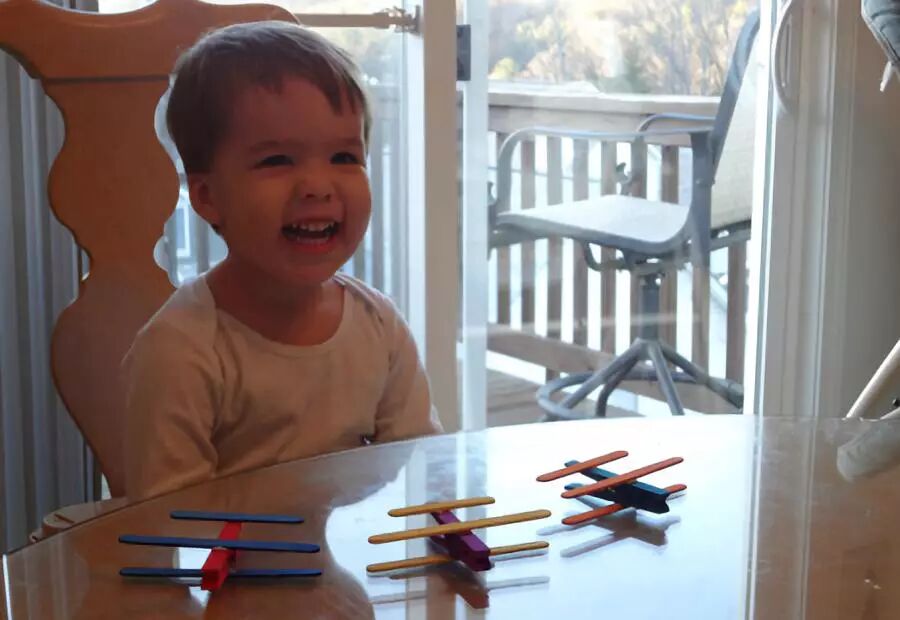
- Once everything is glued, all we have to do is wait until they are completely dry.
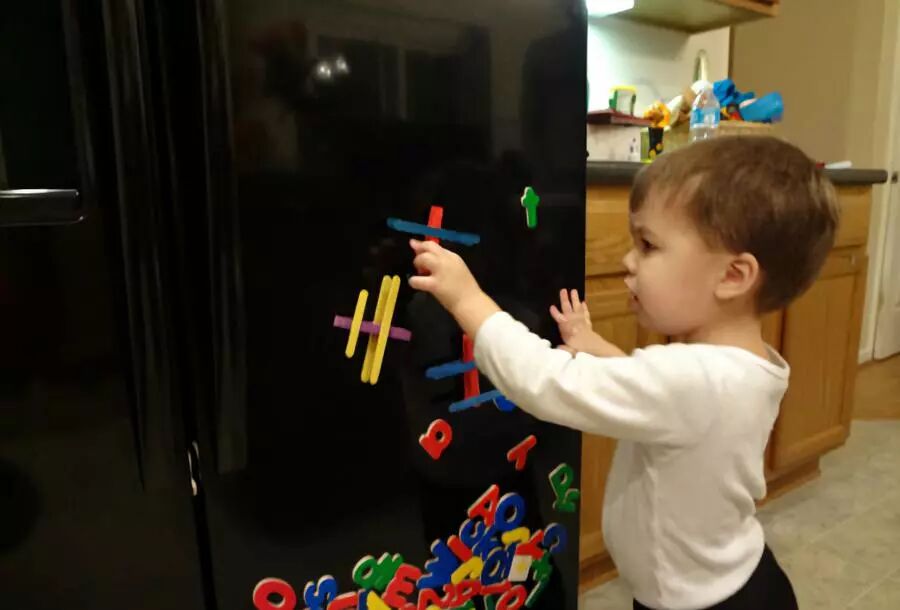
- Once our airplane is dry, let's give them a home - let the children put them on the refrigerator panel!

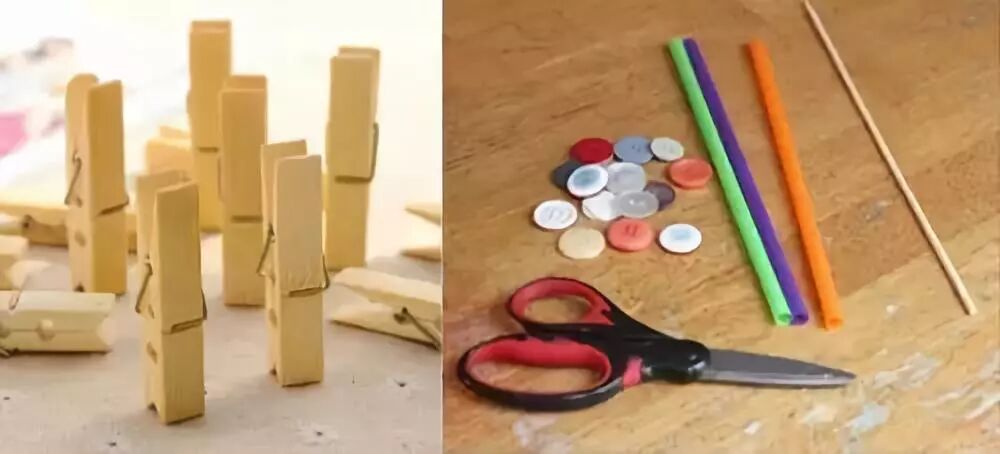
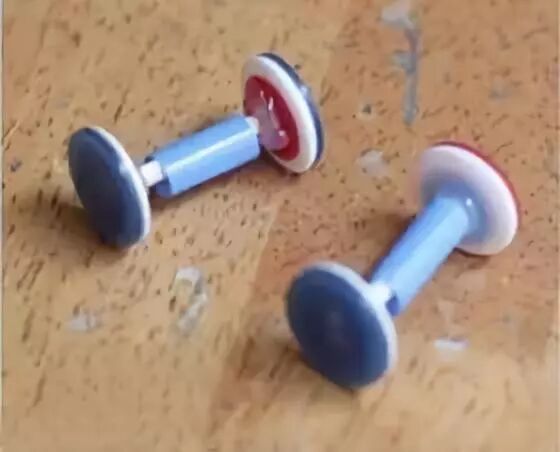
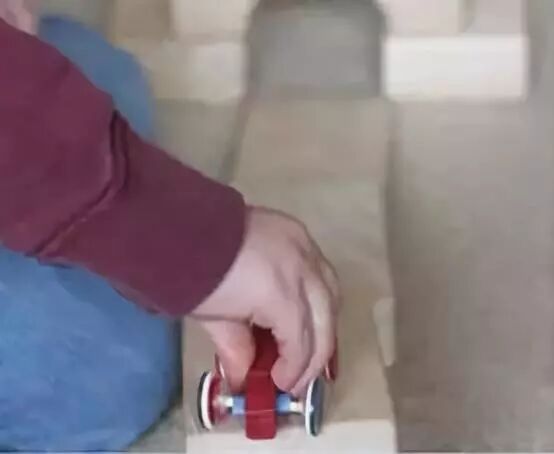
Creative Clothespin Cars
Simple and cute children's car making tutorial, not only looks very beautiful, but also the wheels will turn, and it can really be used to play! Each child makes a car and competes to see whose car slides farther on the inclined track.
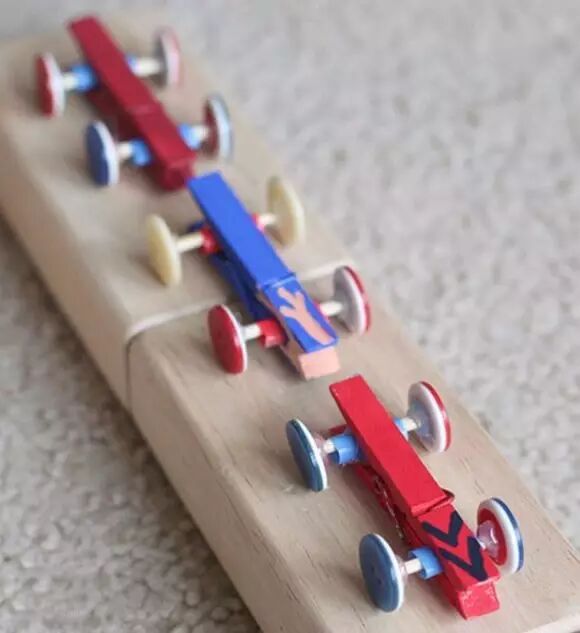
Materials needed: Wooden clothespin, paint, brush, straws, and buttons
Instructions:
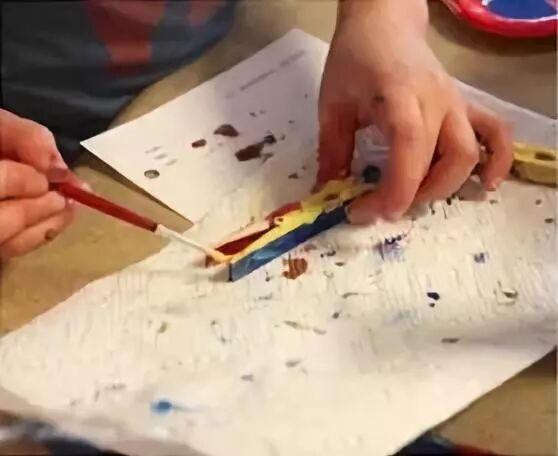
- First paint the wooden clothespin with color
- During the drying process, thread a bamboo skewer through the straw and stick buttons on both ends to make wheels
- Finally, install the wheels on the wooden clothespin, and a simple toy car is completed. Let's have a race, kids!
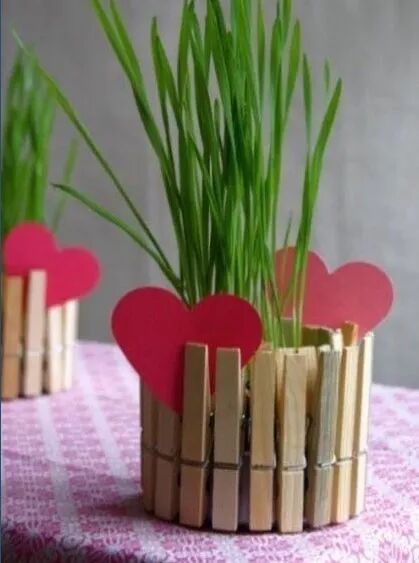
Creative Potted Plants
This is very simple!
Creative finished products, how can children not like them~
The steps of the operation are shown in the figure below.


Sarah Johnson
February 25, 2026 at 10:30 AM
My kids and I had so much fun making these clothespin crafts! We especially loved the whale with the open mouth - my 6-year-old thought it was magical how the sailboat moves inside. We're already planning to make the airplane models this weekend. Great tutorial with clear instructions!