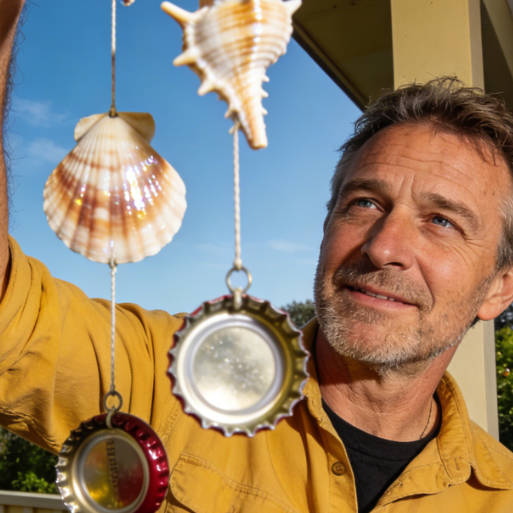
Introduction
Do you like wind chimes? Want to hear the sound of the wind? Then make your own wind chime at home and hang it on your balcony or in your classroom. Listening to the silver bell-like sound as it dances in the wind is a joyful experience... A small wind chime hanging on the windowsill, waiting for the breeze to come, filling the room with crisp sounds - those speakers are really weak in comparison!
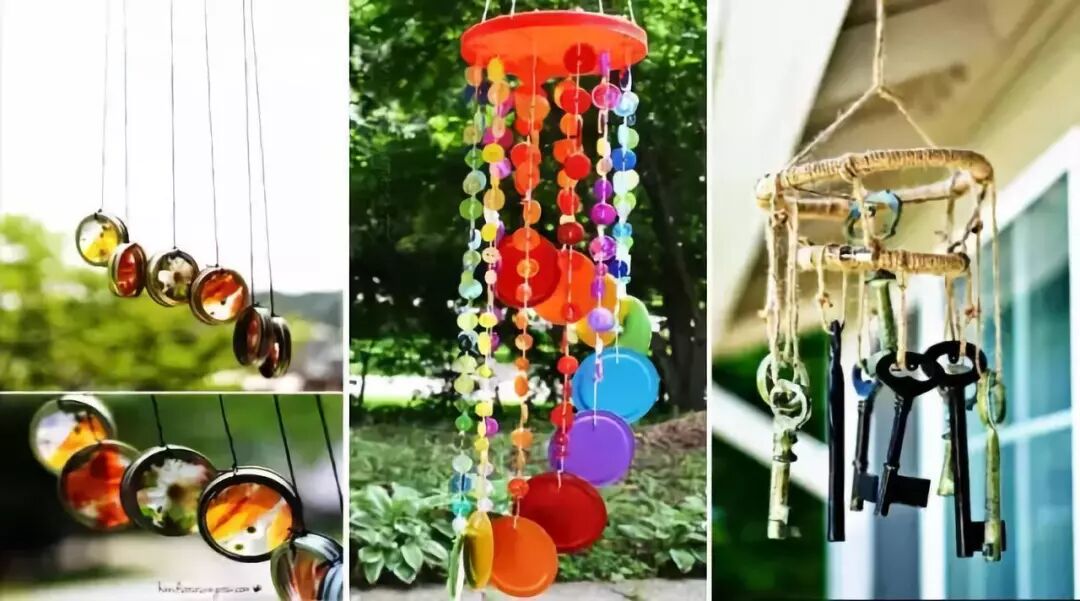
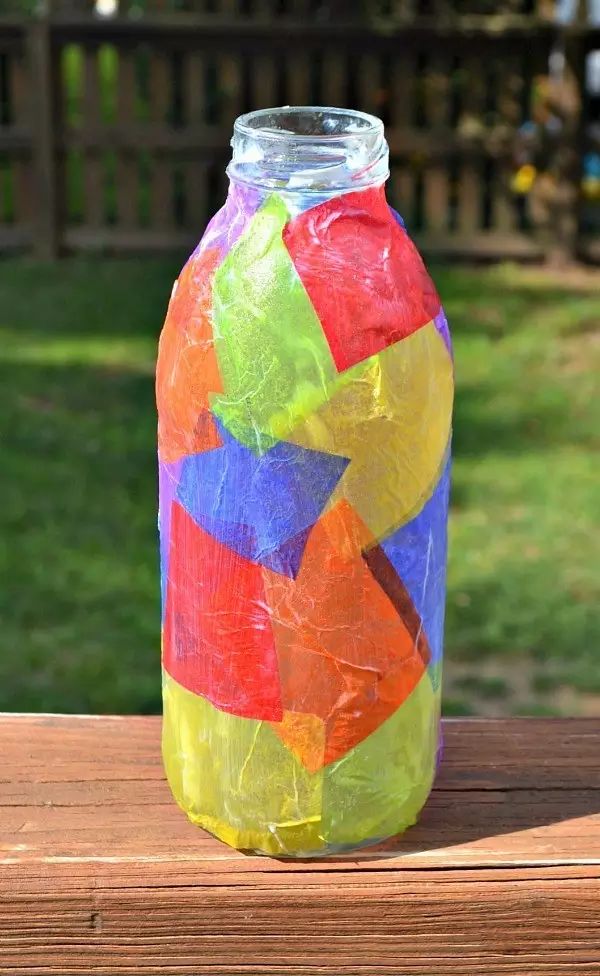
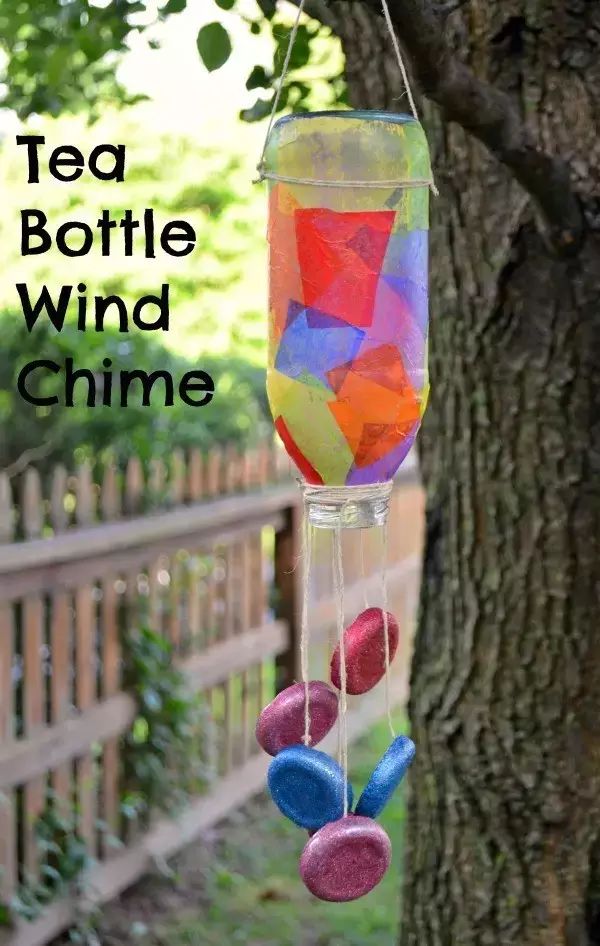
Glass Bottle Wind Chime
The sound made by metal bottle caps is also very beautiful! Don't waste the glass bottle after drinking from it!
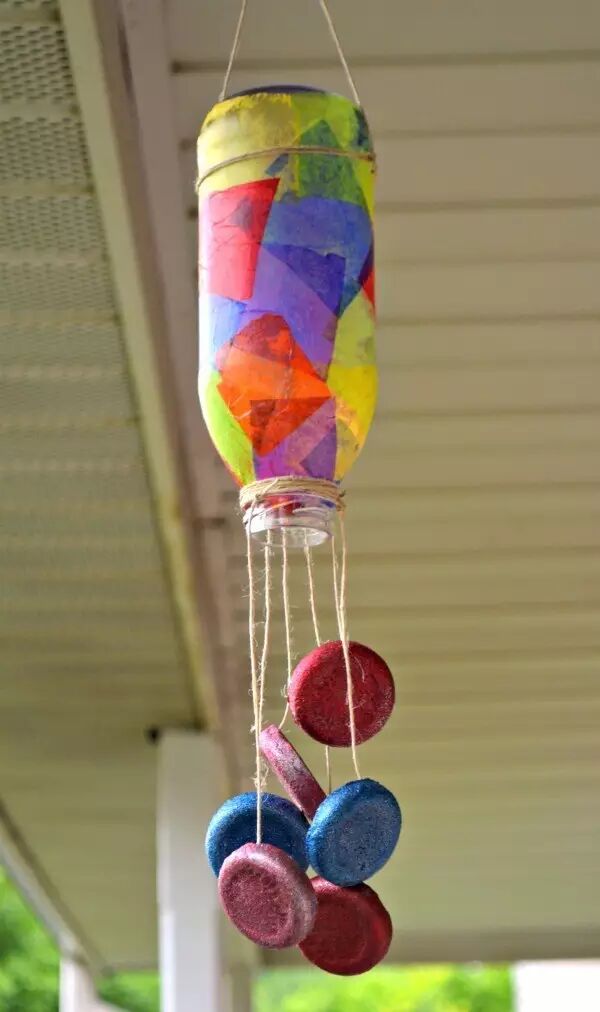
Materials needed: Glass bottle, thin string, bottle caps, glue, colored paper
Instructions:
- Cut colored paper into small pieces and glue them onto the bottle for decoration
- Glue the bottle caps to the thin string, and tie the other end to the inverted bottle mouth
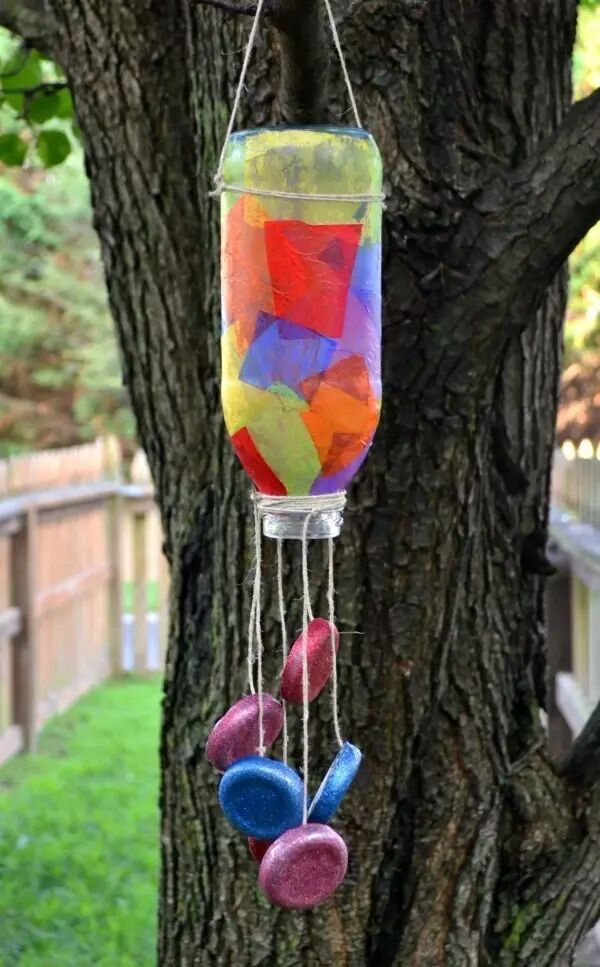
Before making this, I never thought glass bottles could be used for this! When hearing the sound of bottle caps clinking together, the children were so happy!
Popsicle Stick Wind Chime
Want to hang a wind chime on your windowsill? This simple and cute eco-friendly wind chime DIY is completely doable for kids. Follow the steps below to learn how!
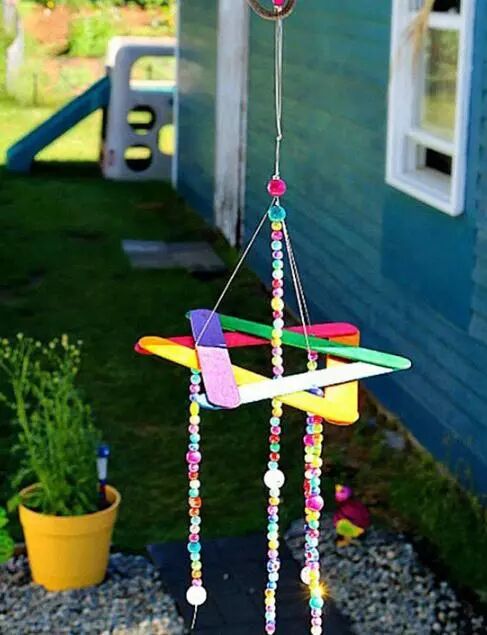
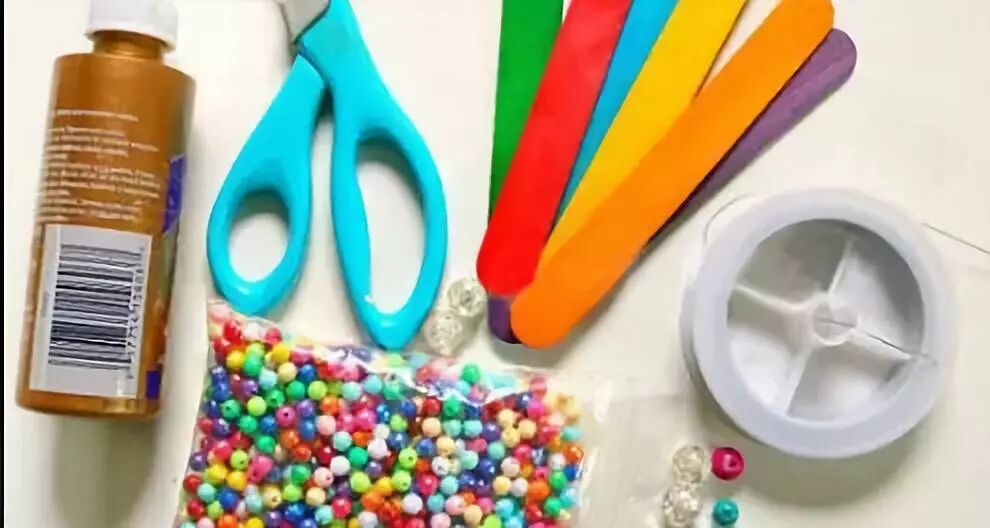
Materials needed: Paint, popsicle sticks, wire, beads
Instructions:
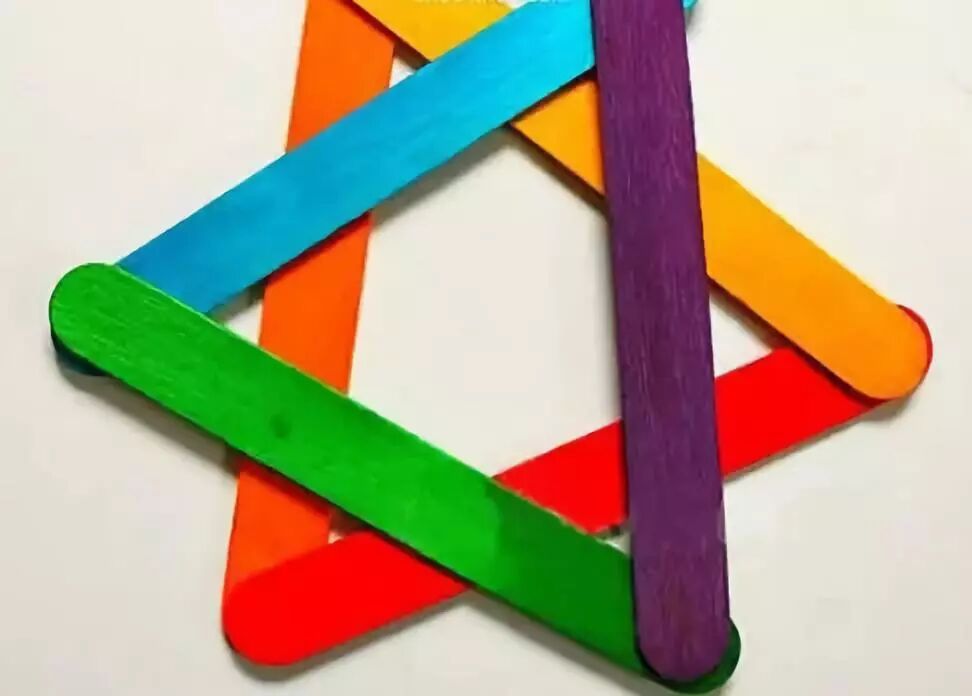
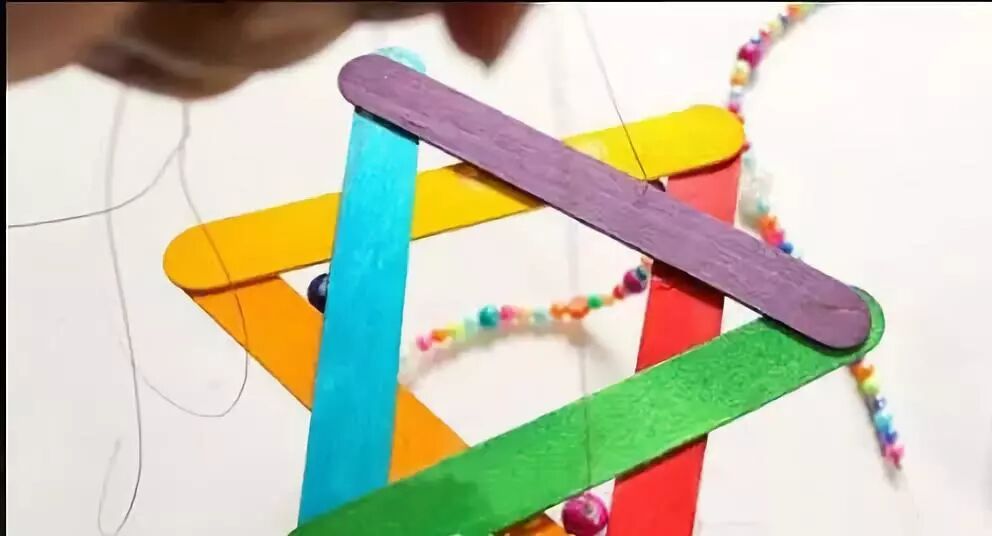
- Take 6 popsicle sticks, paint them different colors, and let them dry
- Assemble them into a hexagonal star shape as shown in the picture and glue them together
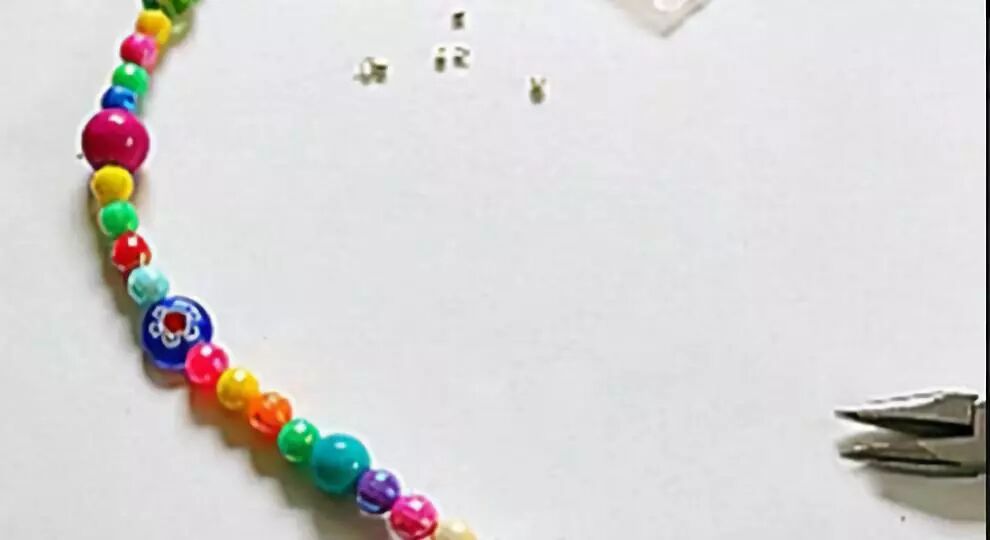
- String colorful beads onto the wire and tie a knot at the end
- Hang the bead chains on the star to create balance
Your cute popsicle stick wind chime is complete! Can't wait to hang it up, right?

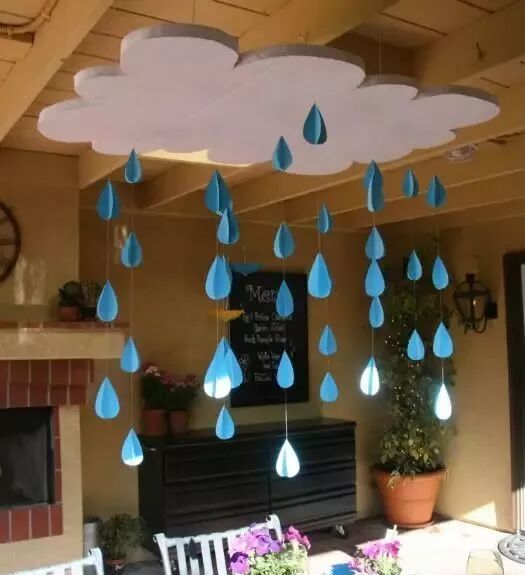
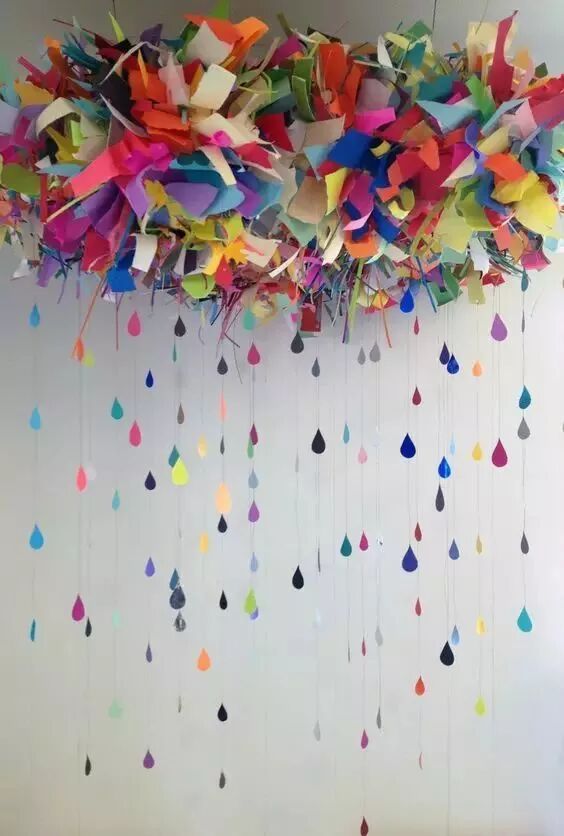
Rain Drop Hanging Decoration

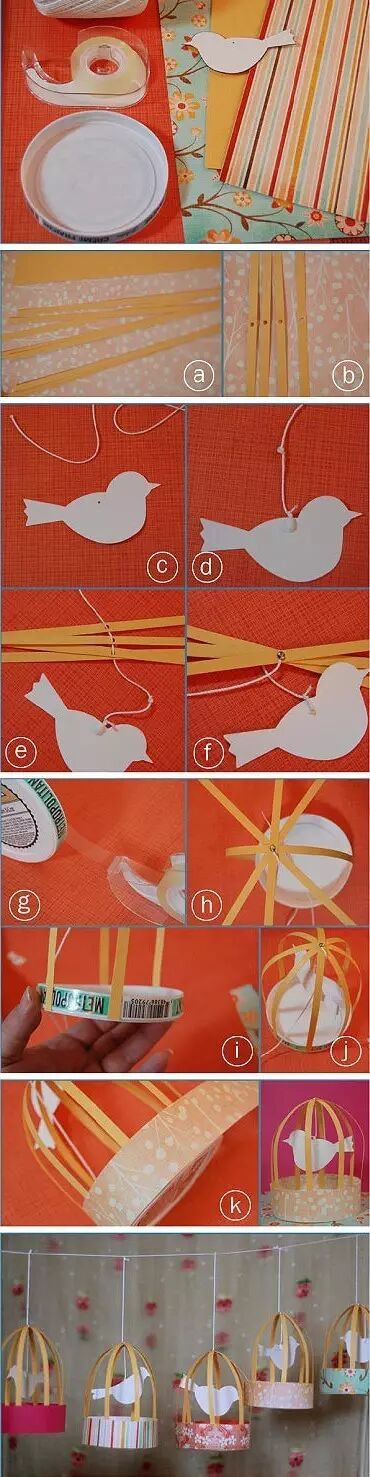
Creative Bird Cage Hanging Decoration
Bird cage hanging decorations are also essential for summer!
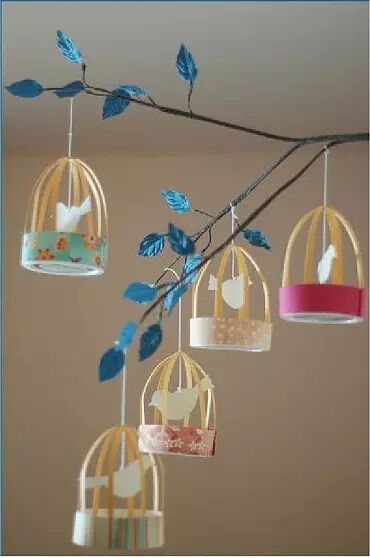
Isn't this bird cage decoration beautiful and creative? Hang it in the classroom and you can see the scene of birds chirping when you look up - very interesting! The tutorial is below, and it's not complicated - kids can do it too!
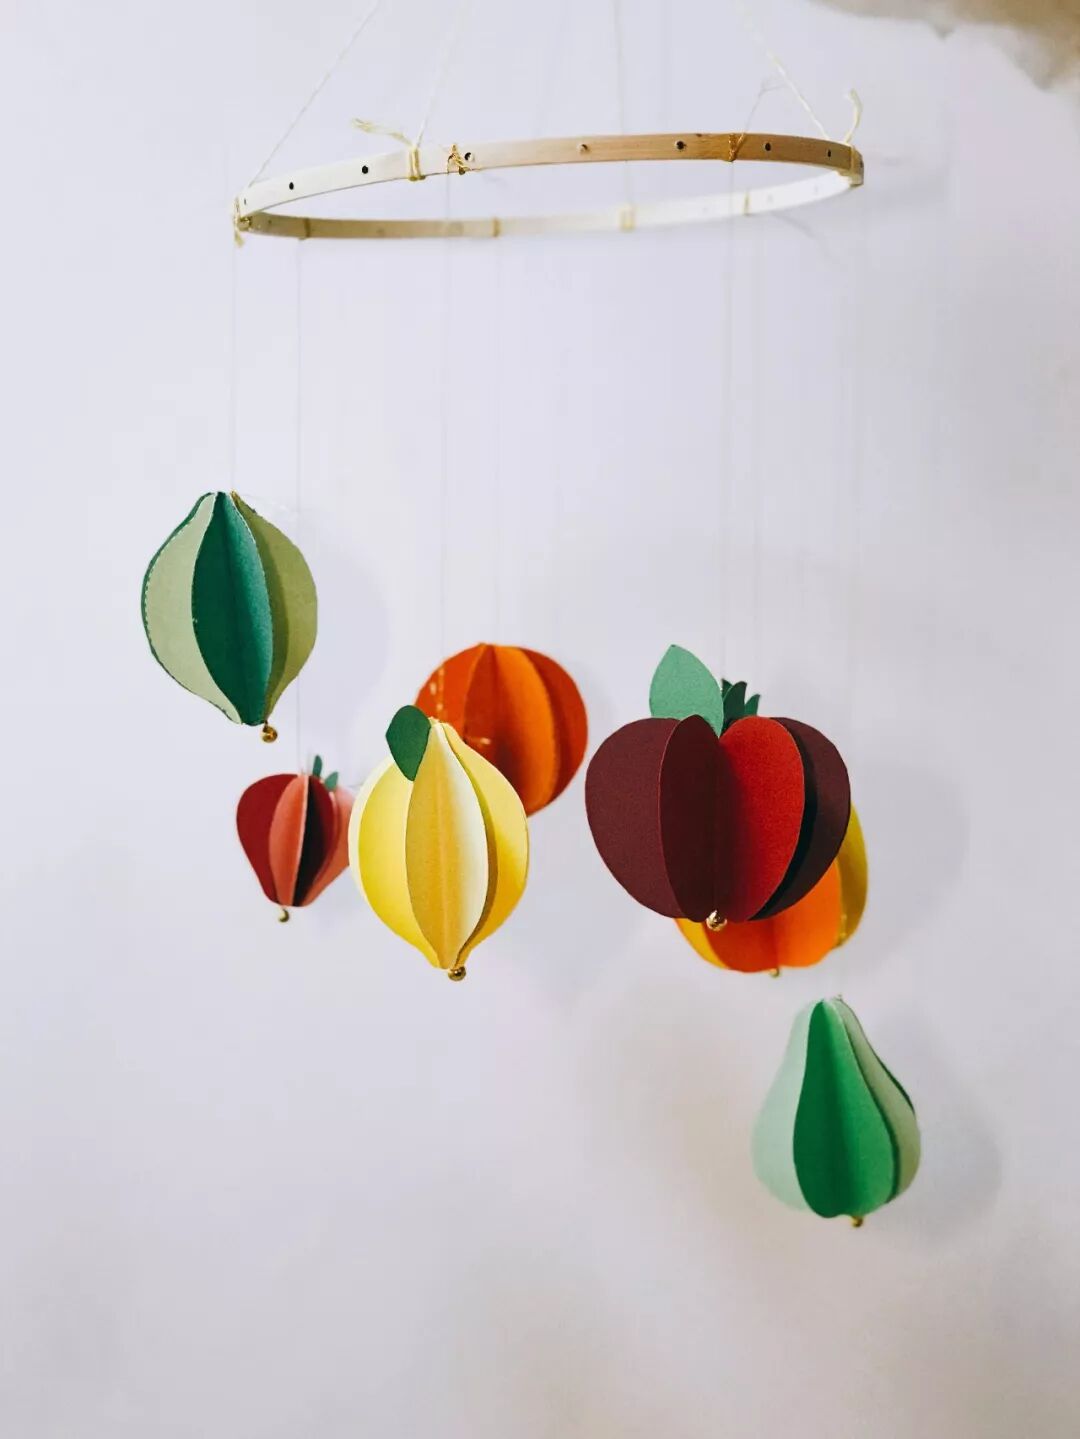
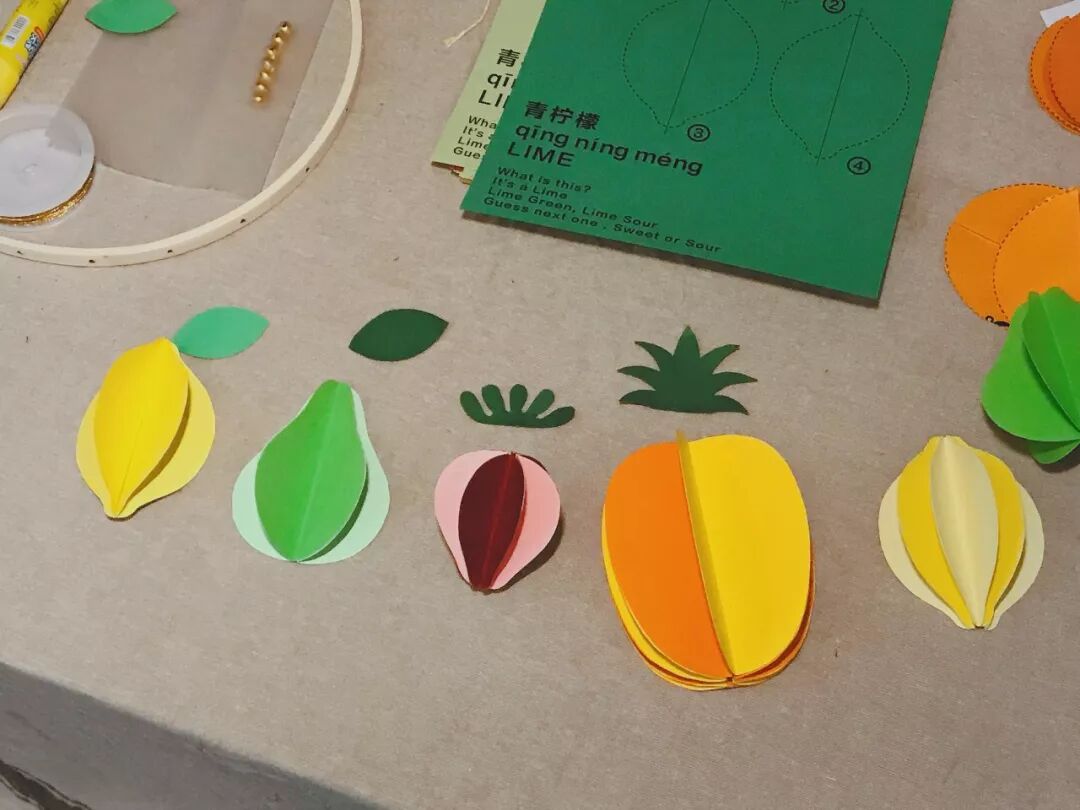
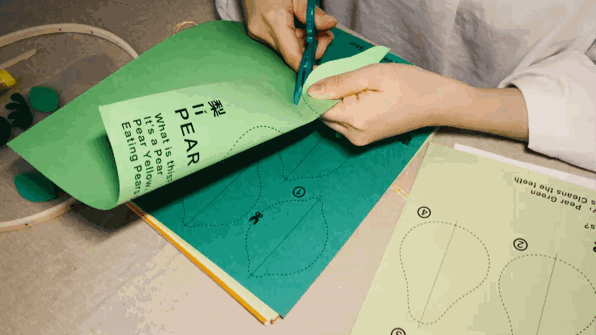
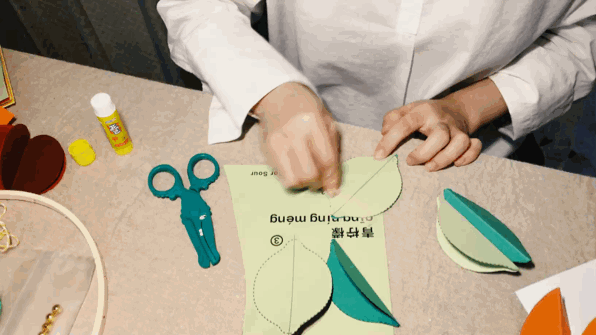
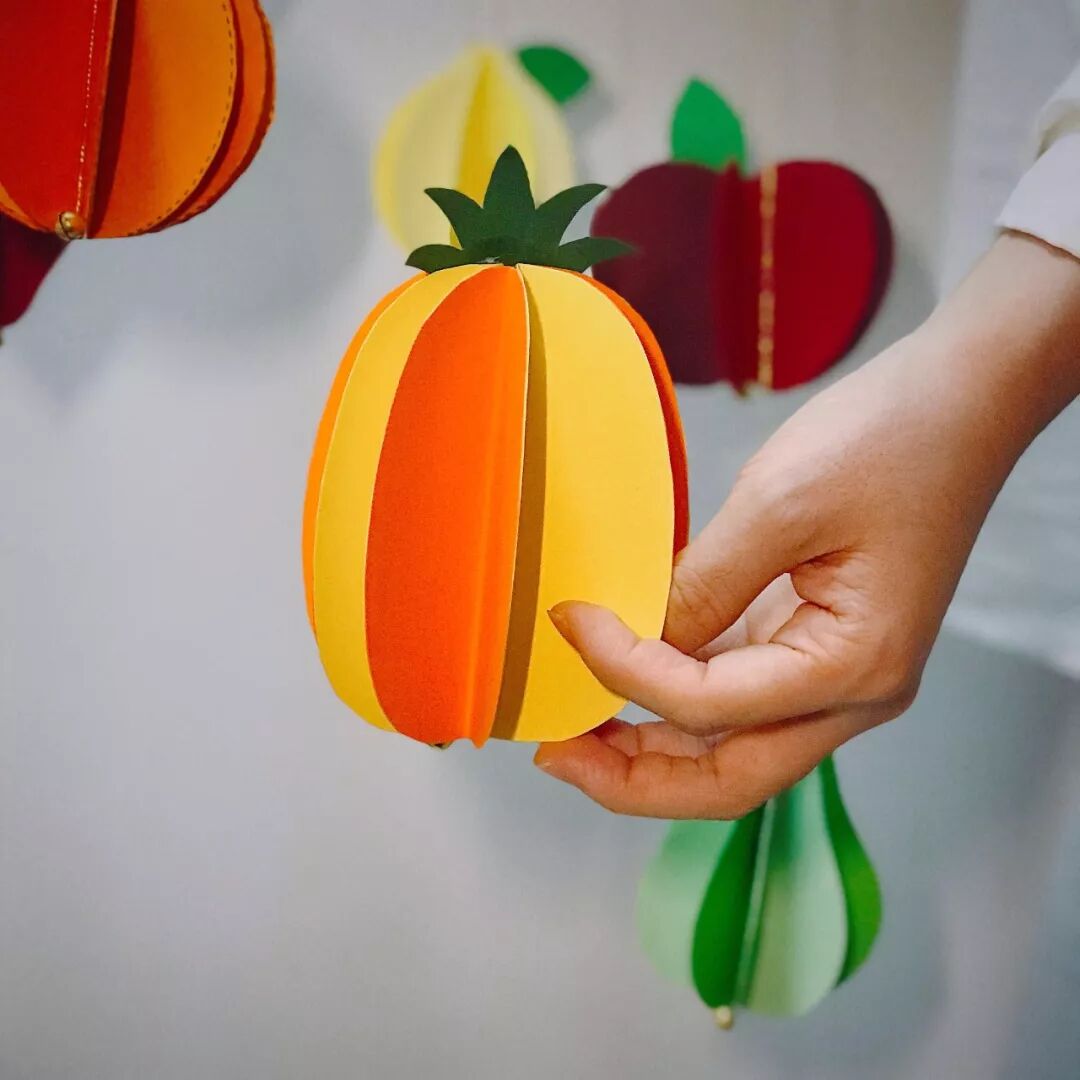
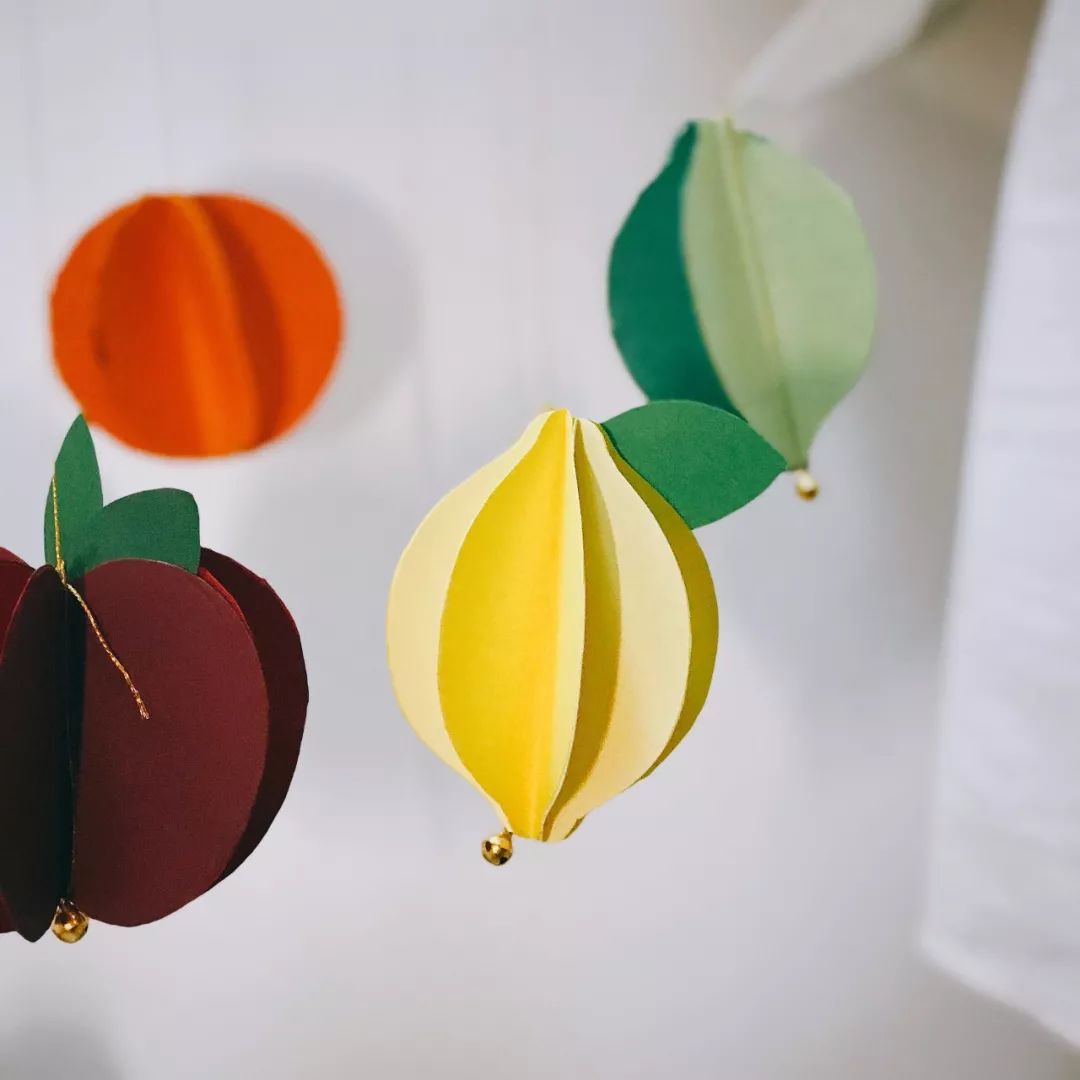
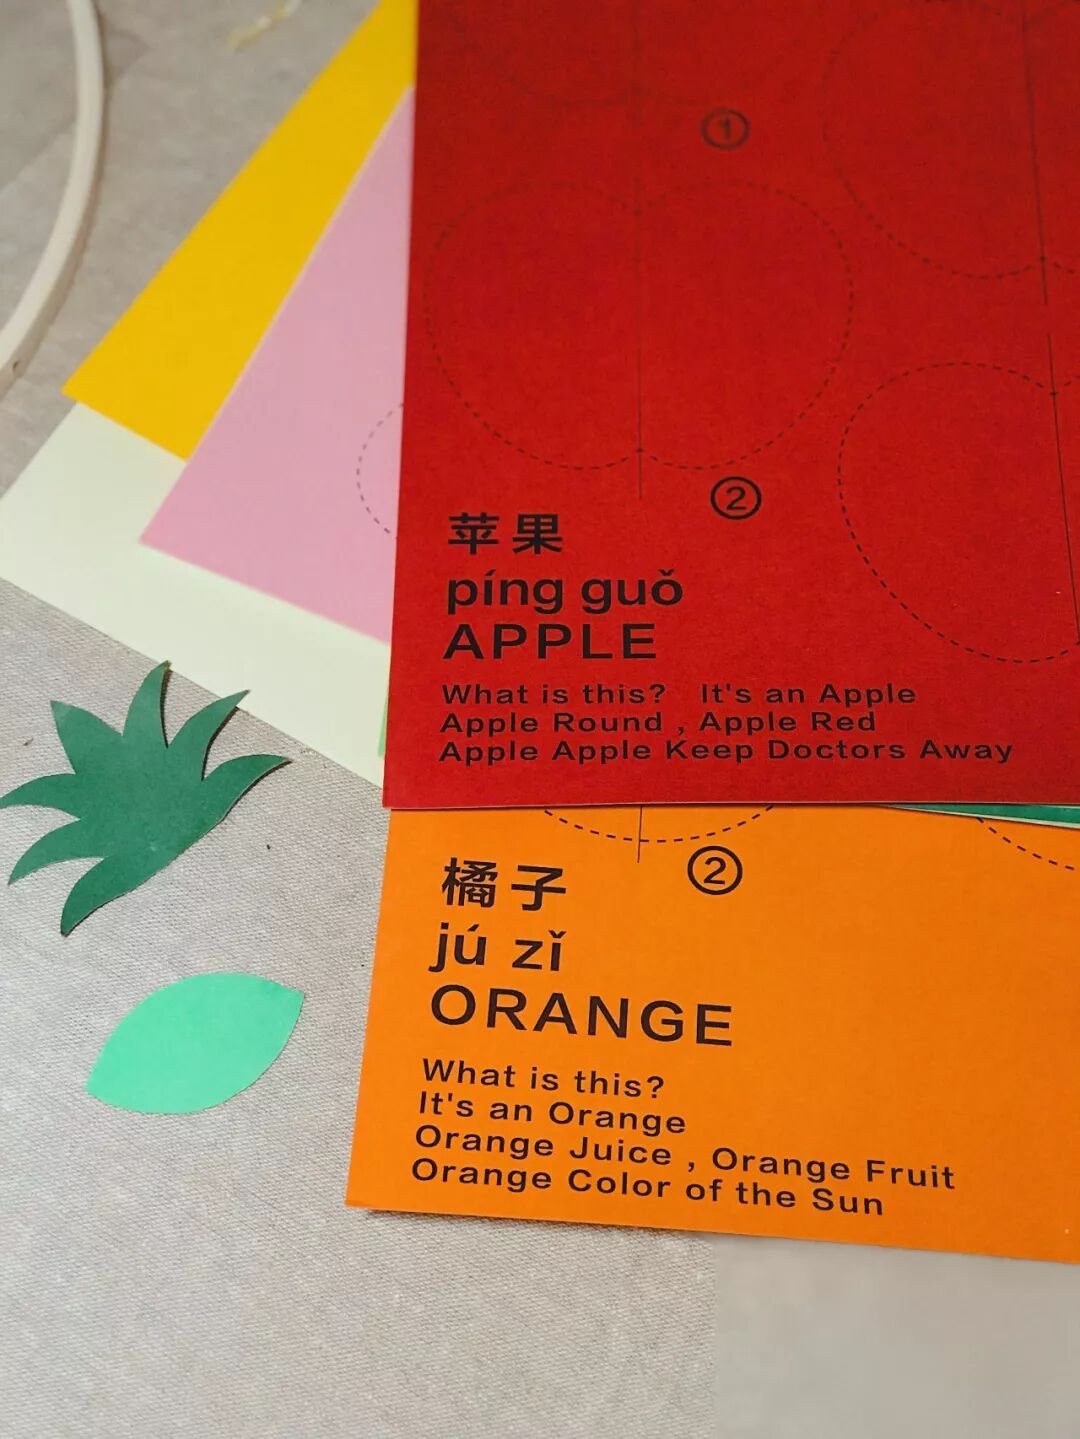
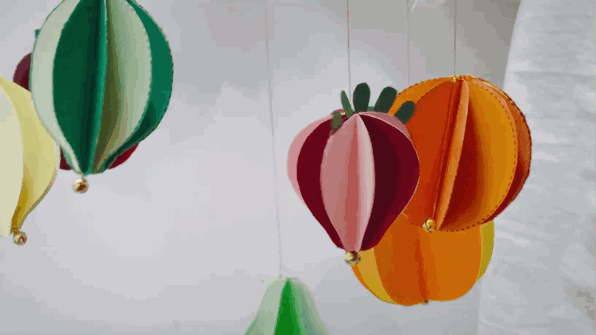
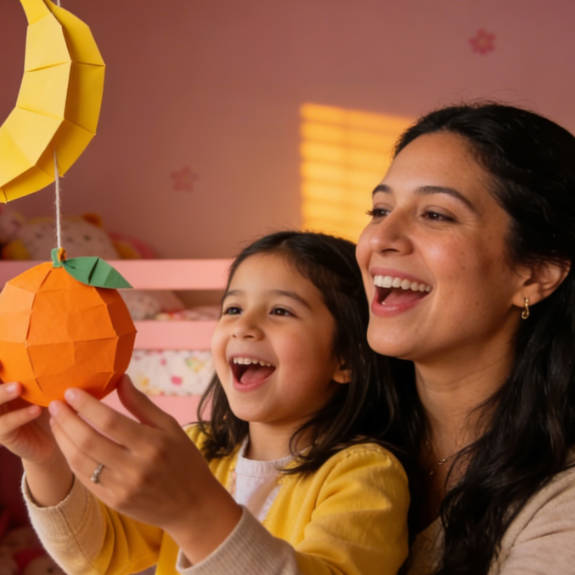
Paper Fruit Wind Chime
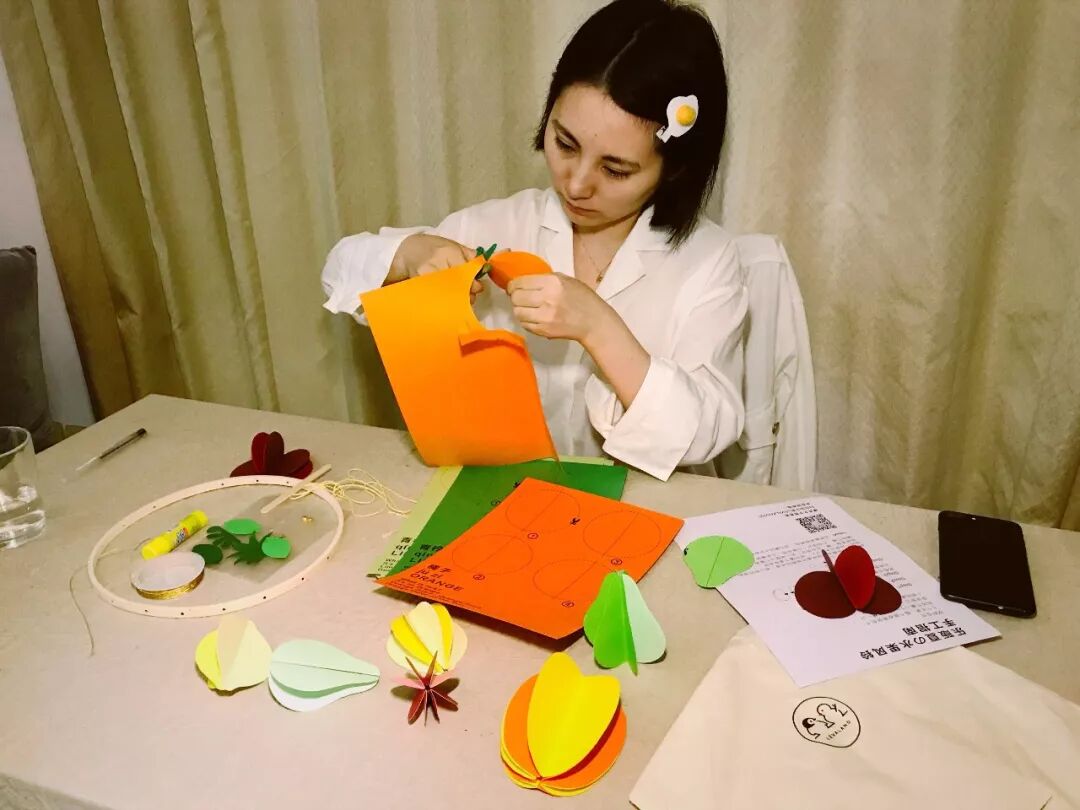
Materials needed: Paper templates, 1 wind chime bamboo ring, glue stick, scissors,Scratch stick, gold thread & hanging thread
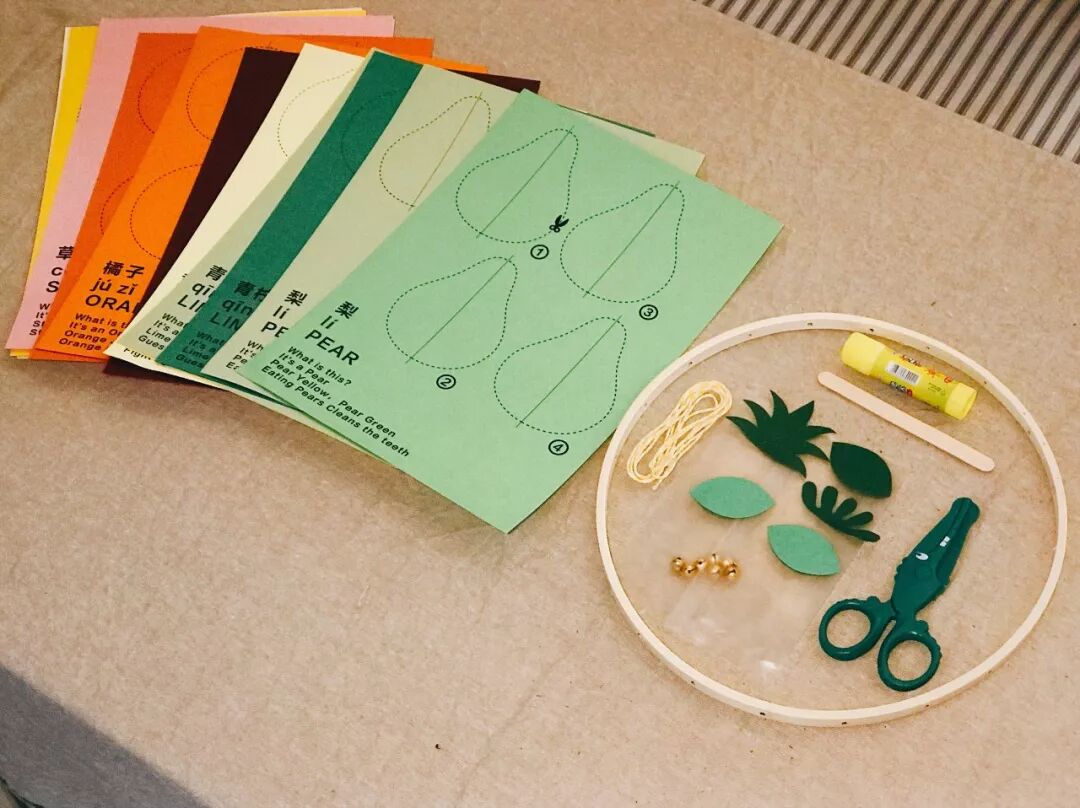
Instructions:
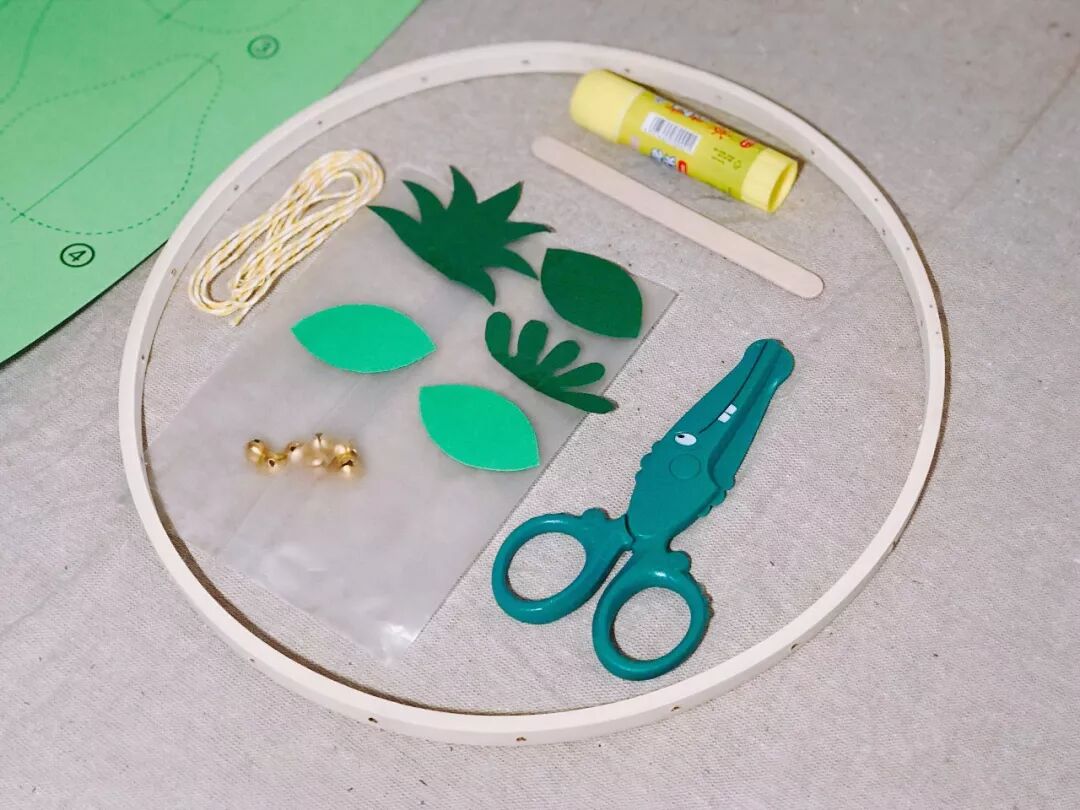
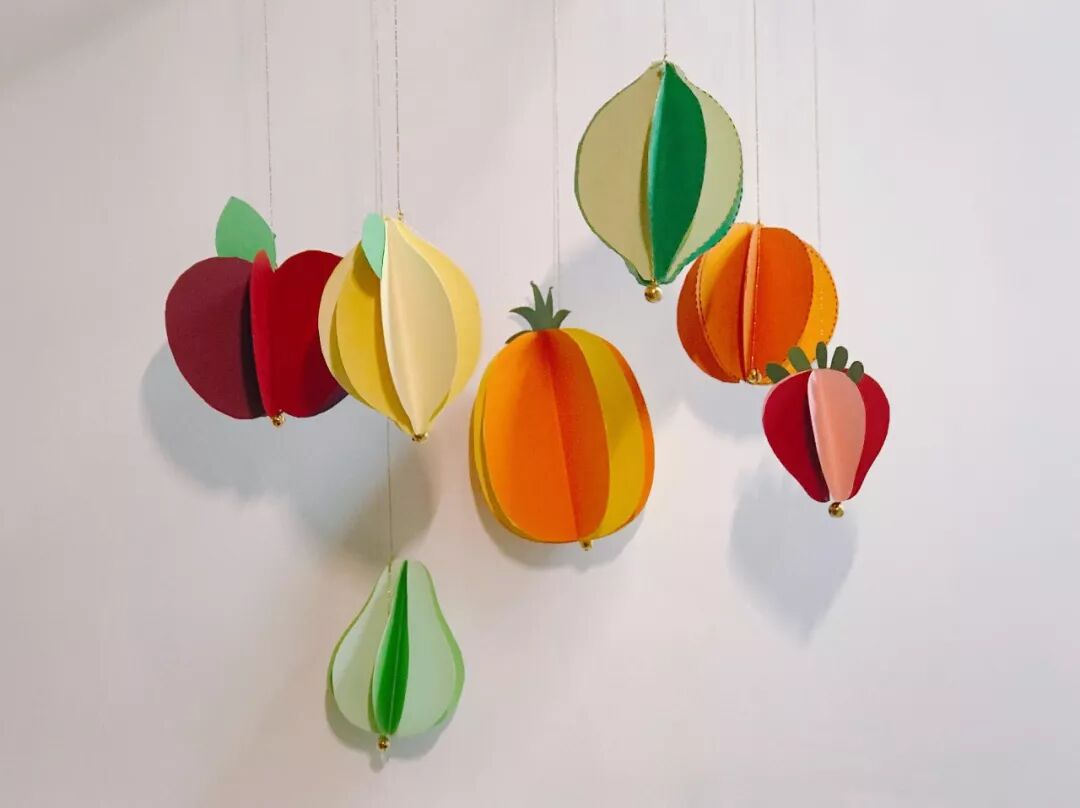
- Make 7 summer fruits: strawberry, lemon, lime, pineapple, apple, pear, orange
- Shake it and the wind chime will make a gentle bell sound
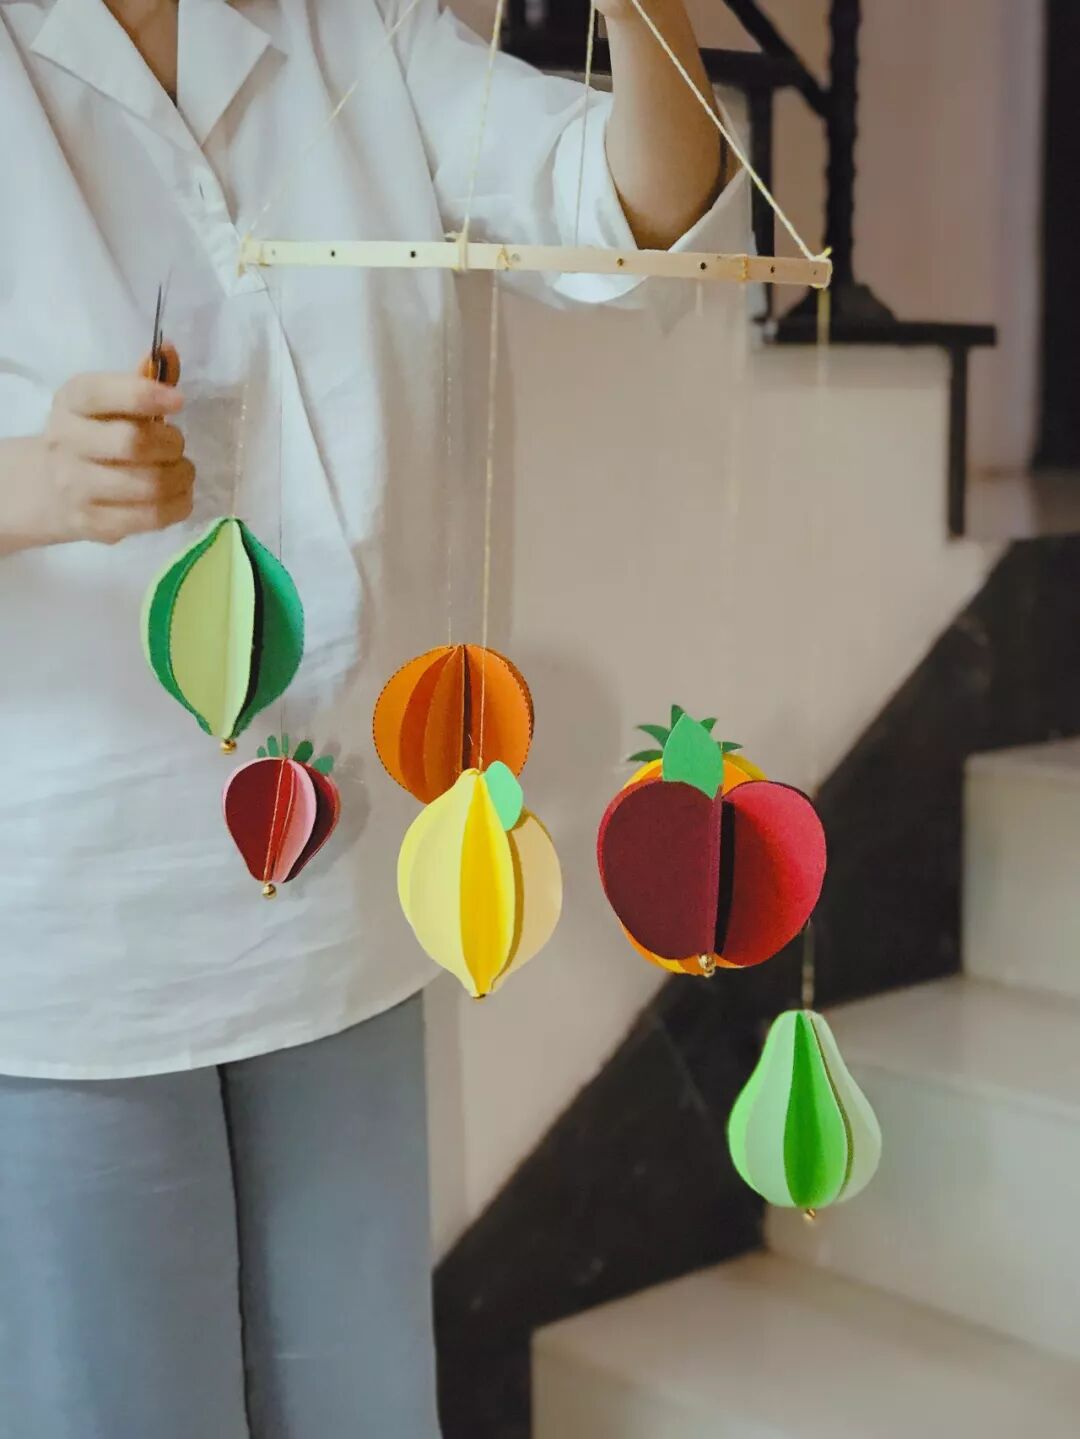
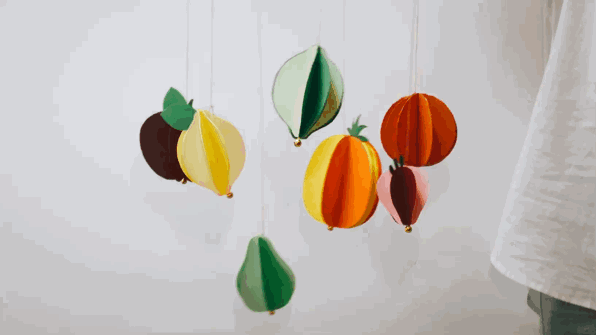
Decorating your small space with your own work gives a sense of accomplishment!

The process of making wind chimes is a great parent-child activity. You can do crafts at home with your children in your spare time! Taking photos and posting them on social media will definitely make you stand out!
English nursery rhymes have been created for each fruit. You can recite the rhymes with your parents or teachers!

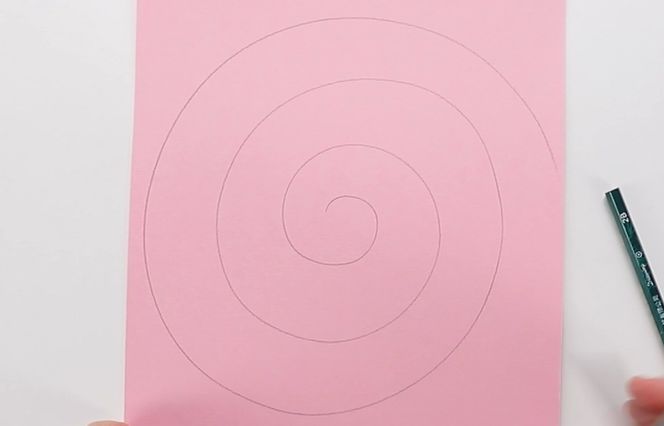
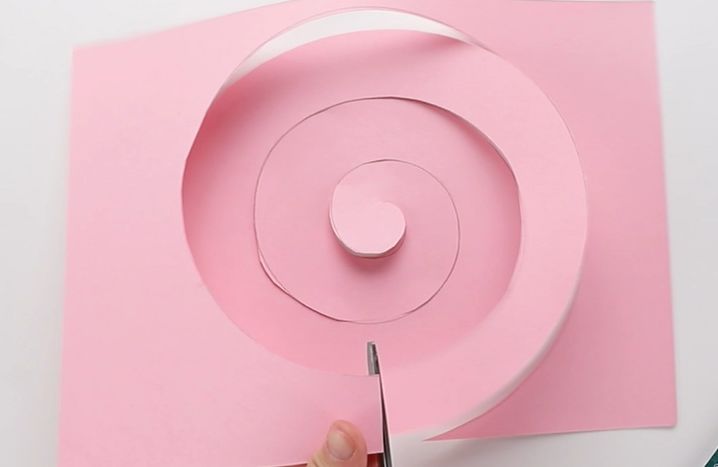
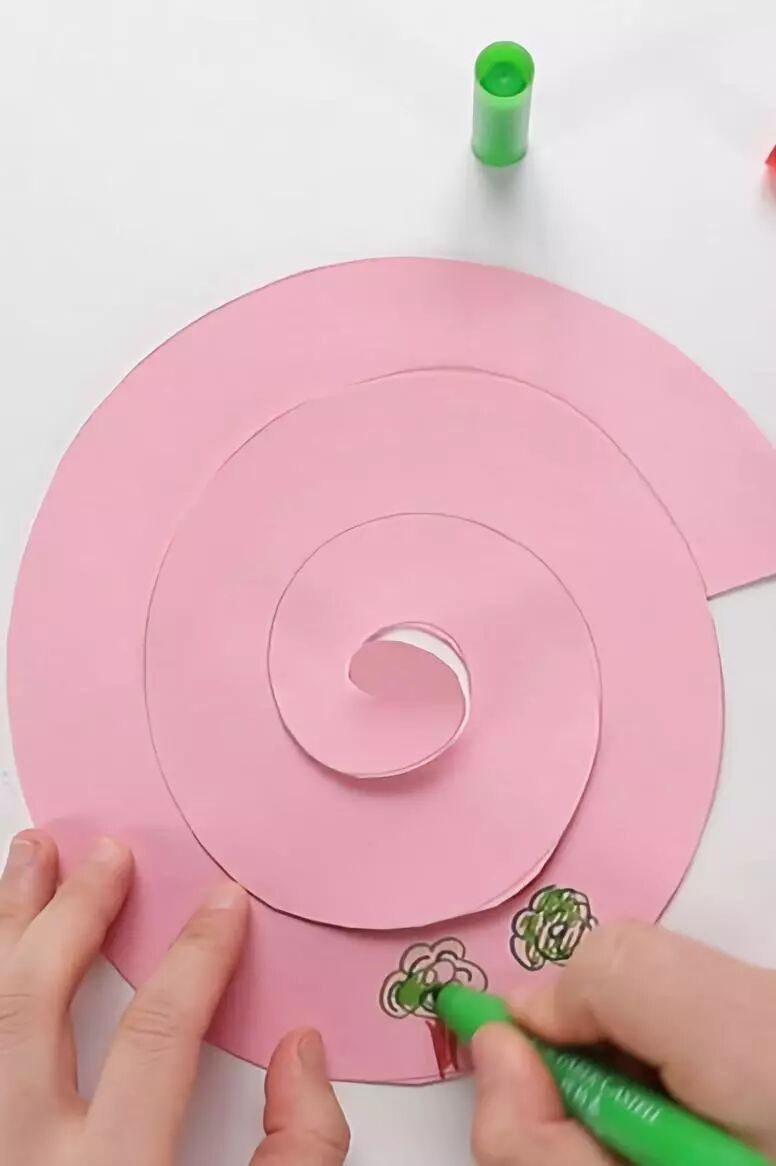
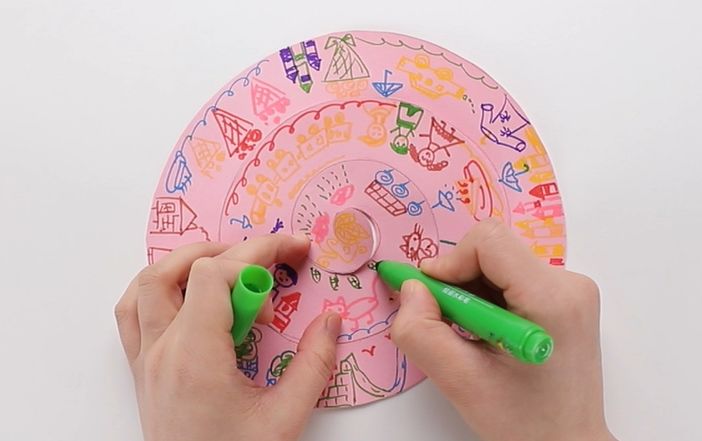
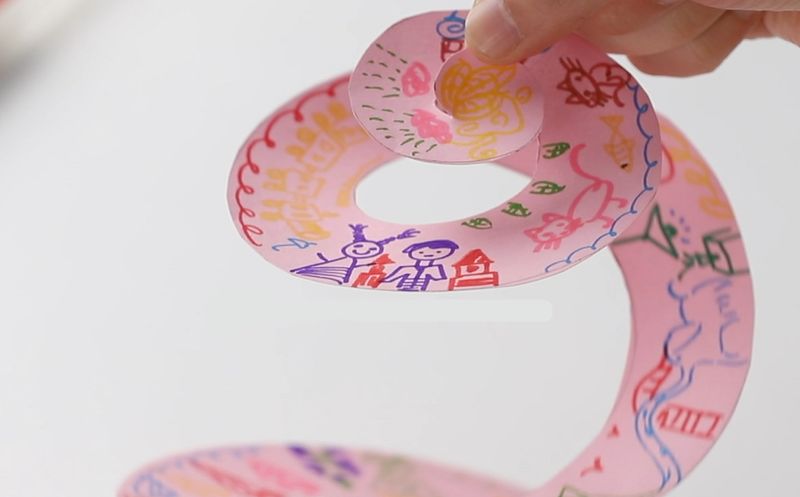
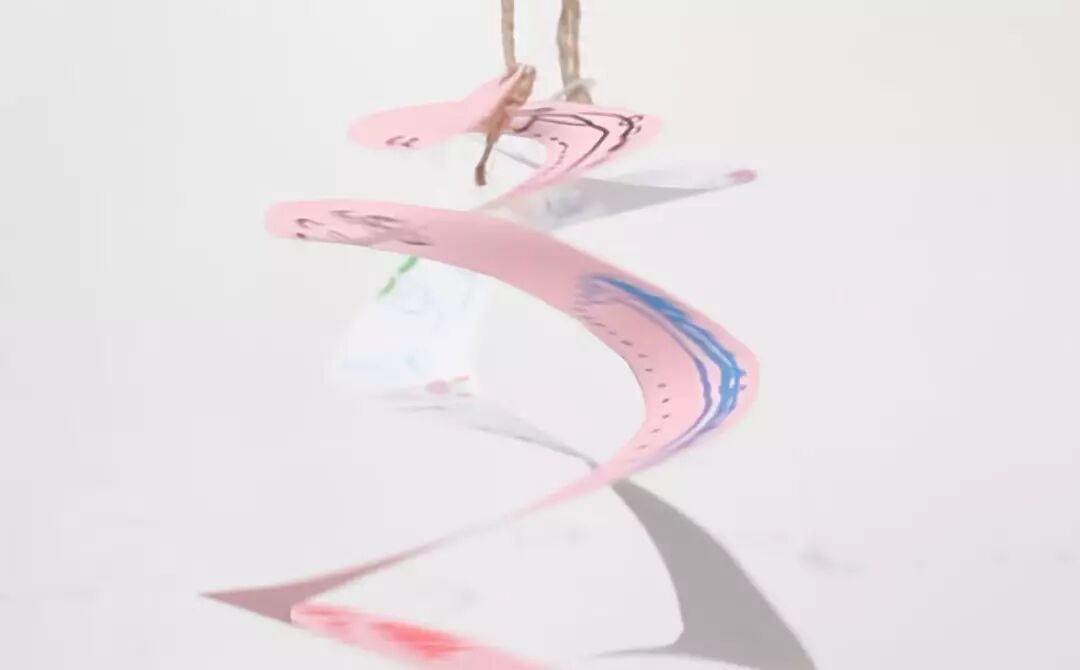
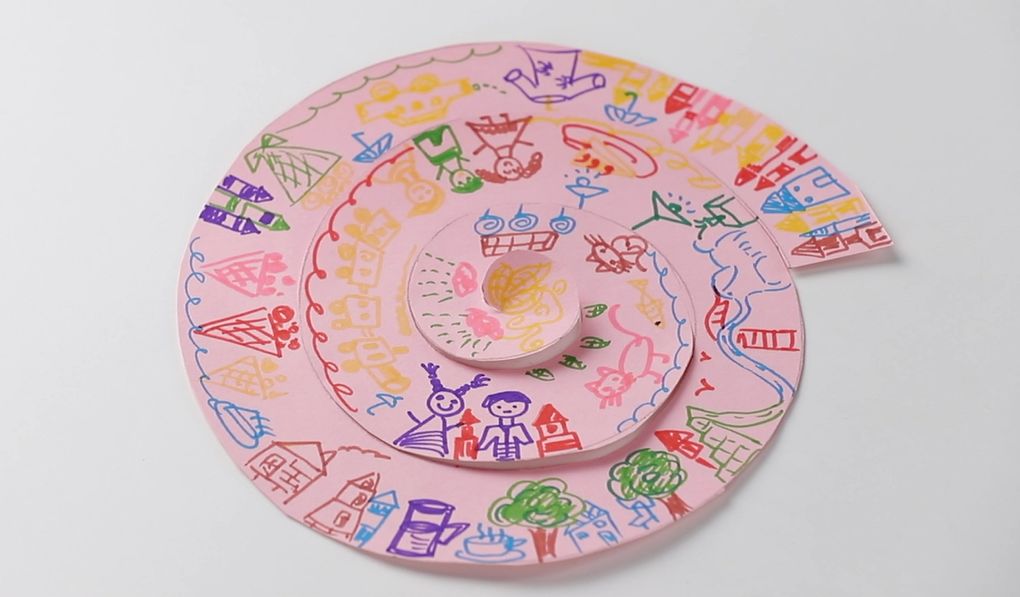
Paper Spiral Wind Chime
Materials needed: Colored paper, scissors, watercolor pens, pencil
Instructions:
- Draw a spiral line
- Cut along the line
- Draw decorative patterns on the wind chime
- Attach a hanging string to the wind chime
- Wind chime, wind chime spin around~~
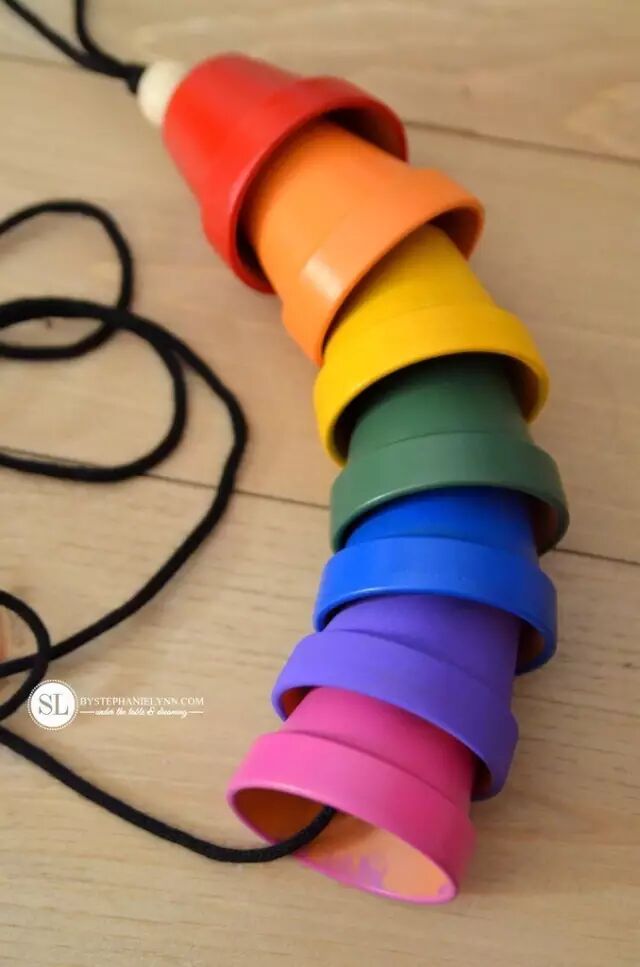
Flower Pot Wind Chime
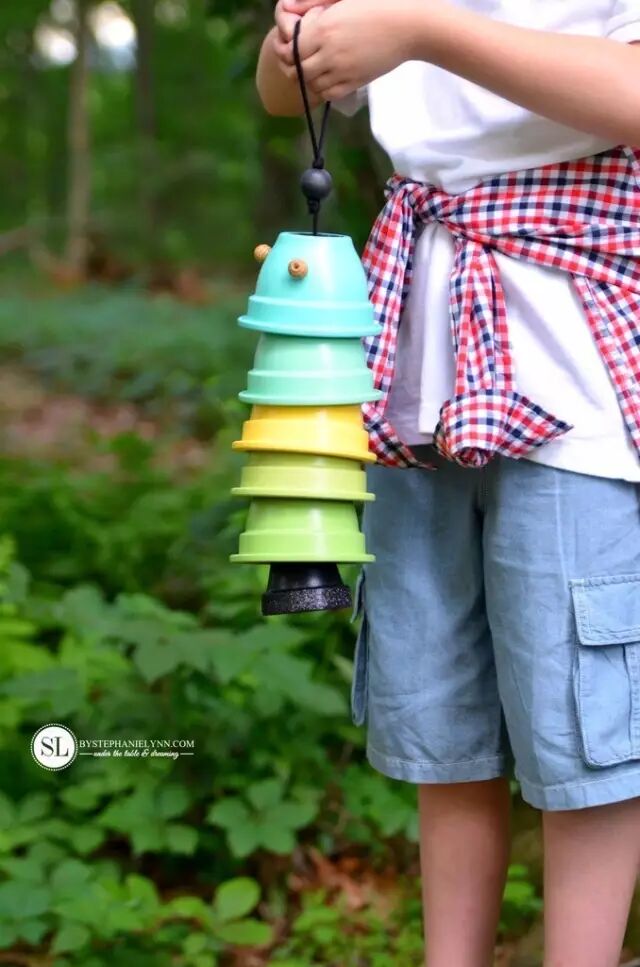
Flower pots and wind chimes combined? Such a creative idea - you'd be missing out if you don't make one!
Materials needed: Flower pots, string, small wooden beads, paint
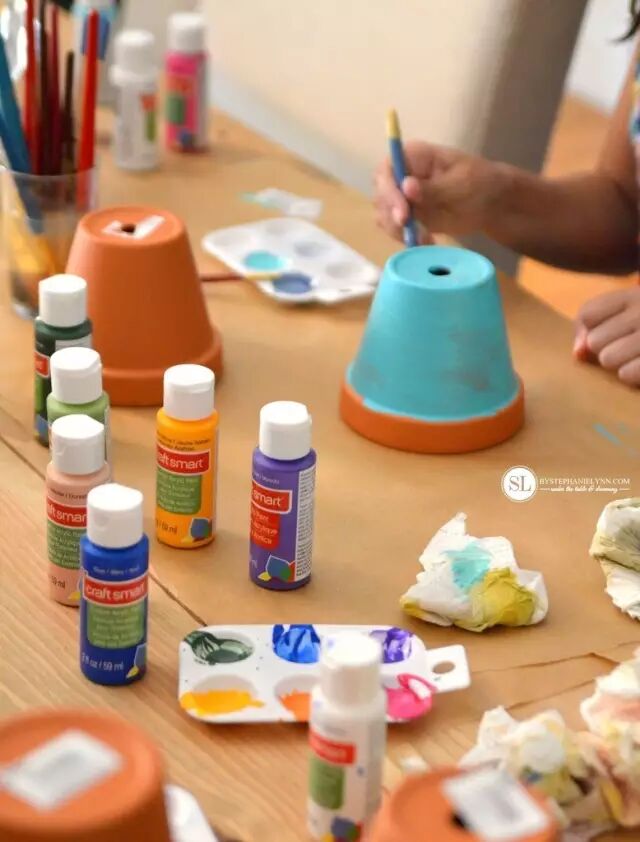
Instructions:
- First, paint the flower pots with nice colors and patterns
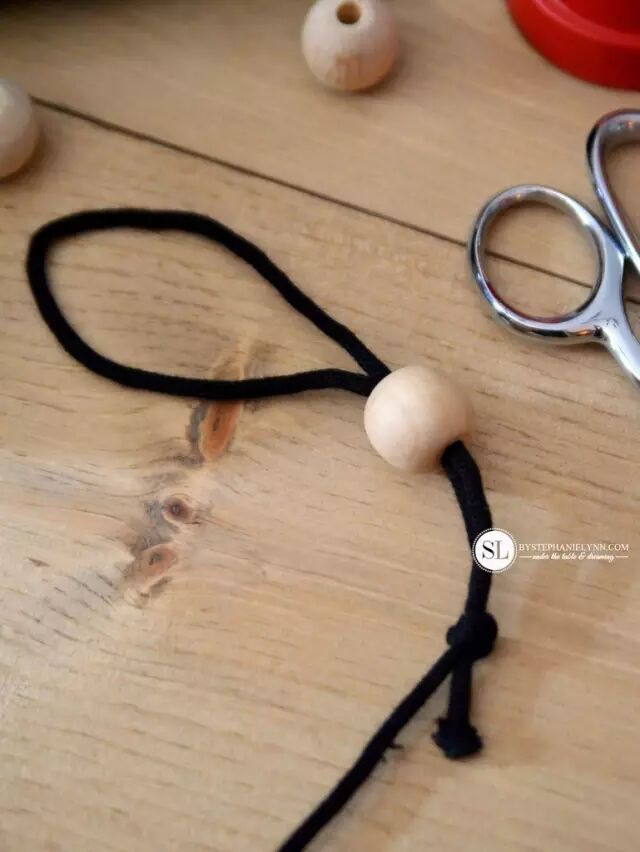
- Prepare slightly thick and strong string, tie a knot and thread on small wooden beads as a handle
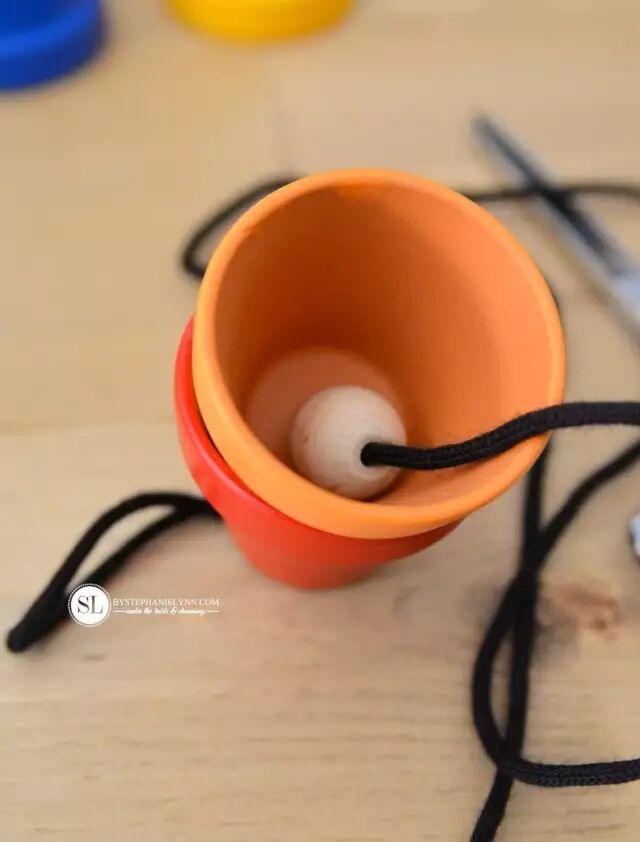
- Thread the flower pots through the other side of the knotted string, and add another wooden bead - make sure the bead is larger than the small hole at the bottom of the flower pot
- Arranging the flower pots in a regular color pattern will look even better!
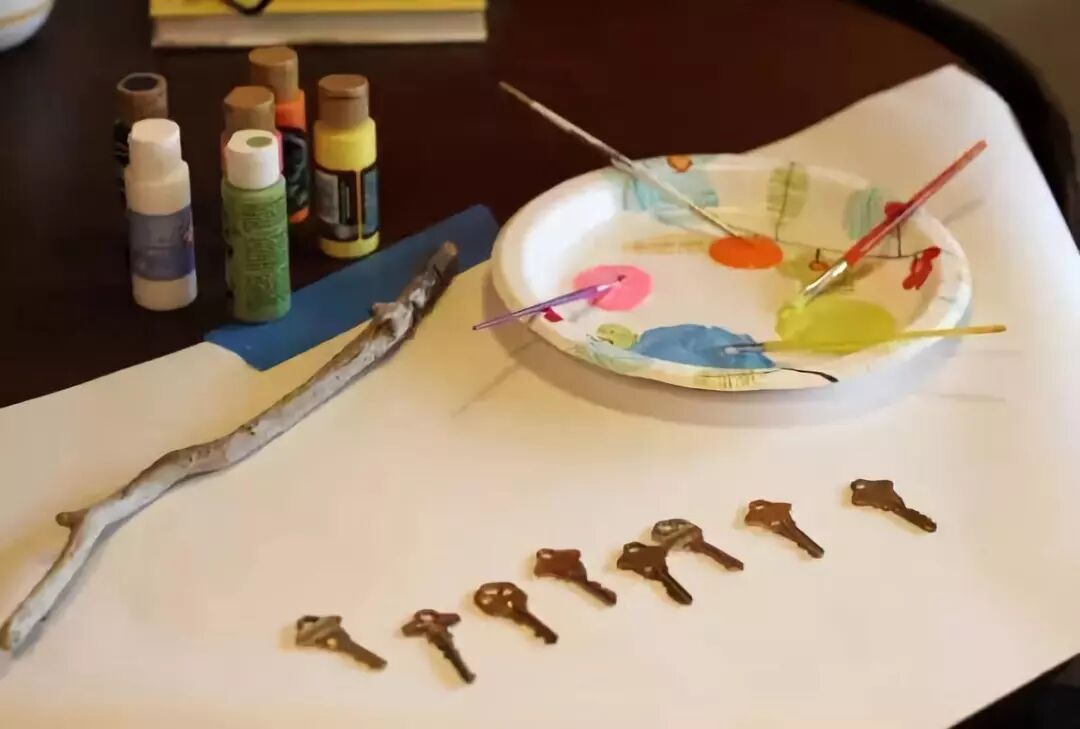
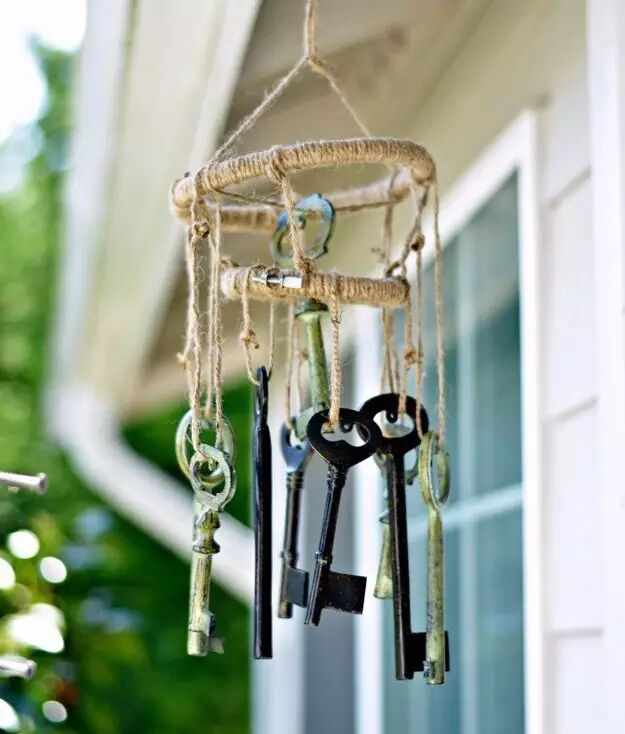
Old Key Wind Chime
When my baby was little, he especially liked to Clinging to me for the keychain to listen to the sound of keys clinking. So let's make the keys officially become a wind chime!
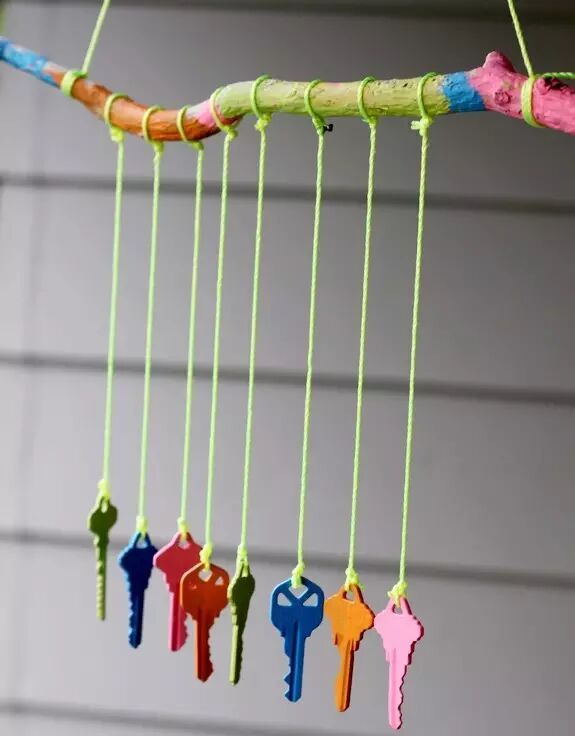
Materials needed: Keys, string, wooden stick or hanger
Instructions:
- Think the keys look ordinary? Make them prettier! Paint the keys and branch with nice colors
- Thread the keys with thin string and tie them to the branch. If you don't want to use a branch, you can also use a hanger at home!
- Depending on different materials, the arrangement and distance of the keys can be different, which will also affect the sound of the keys clinking. Want to hear what it sounds like? Try it with your child!
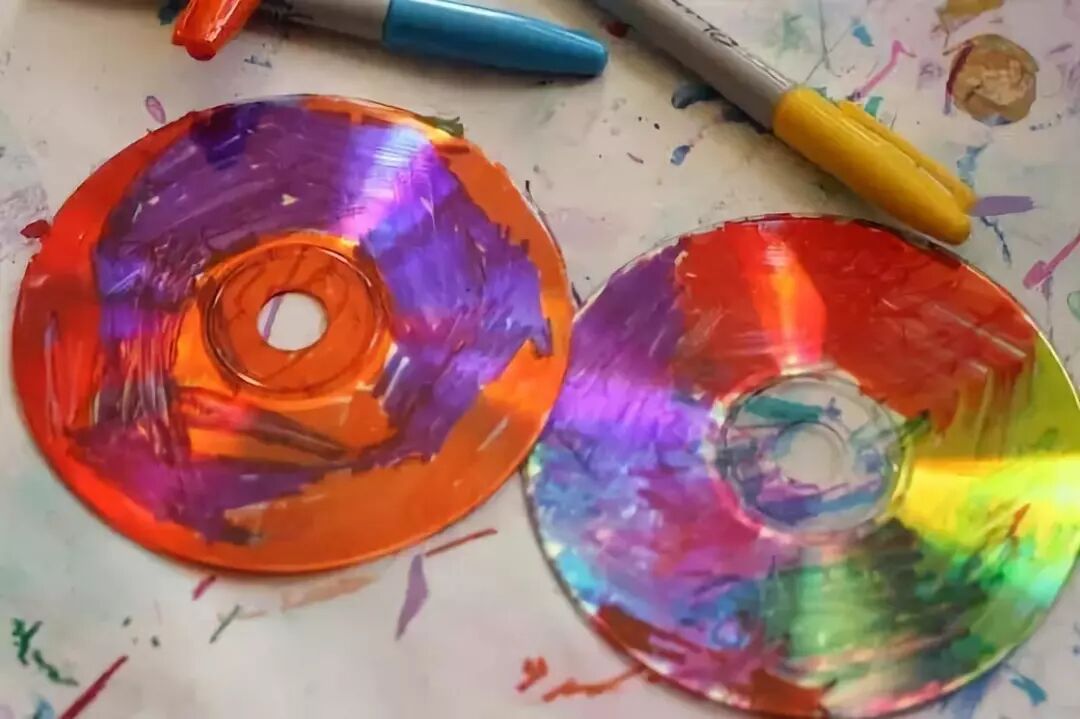
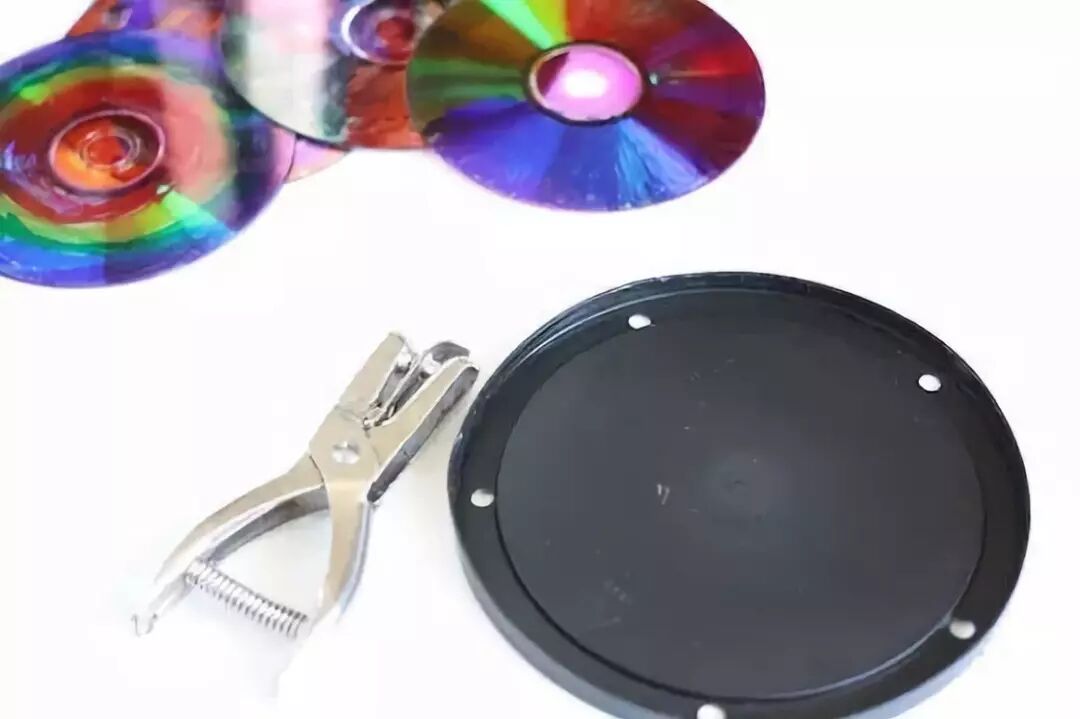
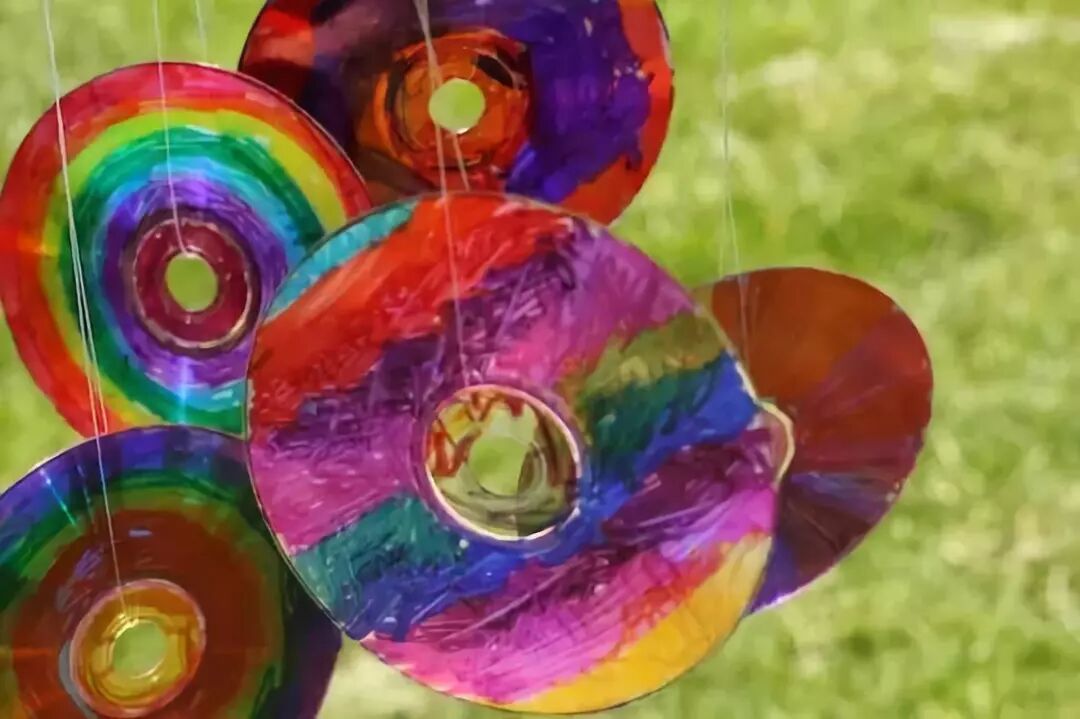
CD Wind Chime
With iPads and computers, CDs are not commonly used anymore. These unused CDs actually make great wind chime materials!
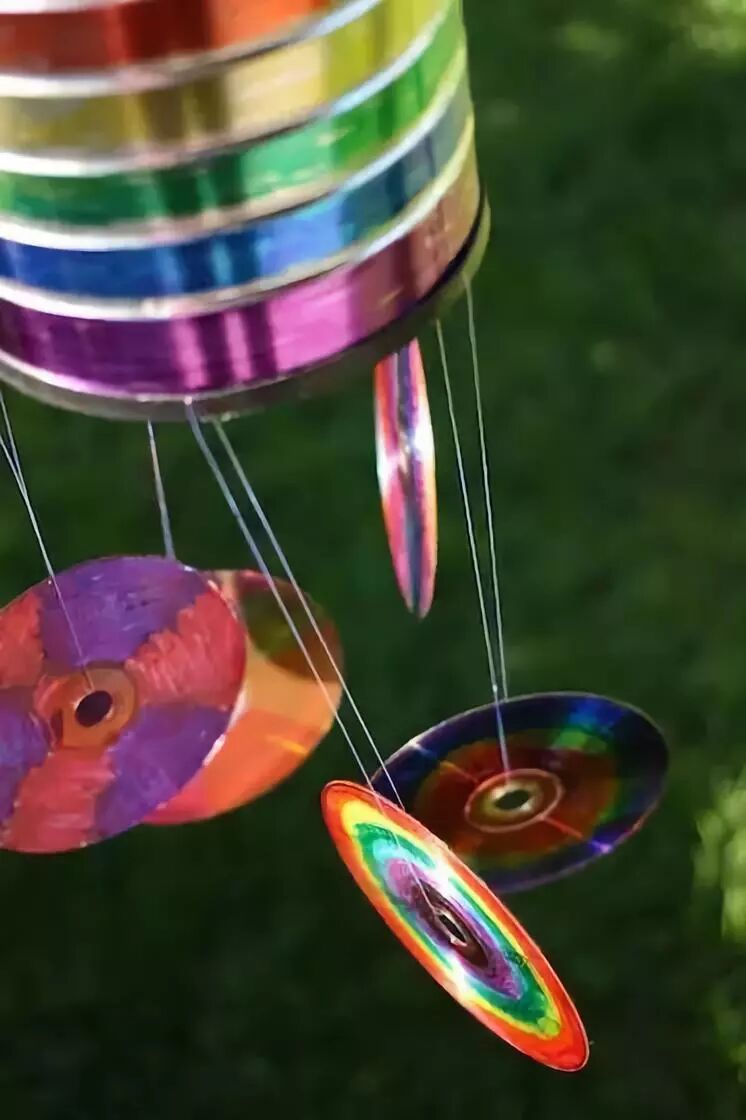
Materials needed: CDs, paint, thin string, plastic jar, hole punch
Instructions:
- Paint and draw on the CDs
- Use a hole punch to make holes in the plastic jar lid (recommended to make five)
- Thread the CDs onto thin string and pass them through the small holes in the plastic jar lid, then tie knots
- Finally, put the lid on the plastic bottle, invert the plastic jar, and you'll have a special CD wind chime! Kids can also draw and decorate the jar!

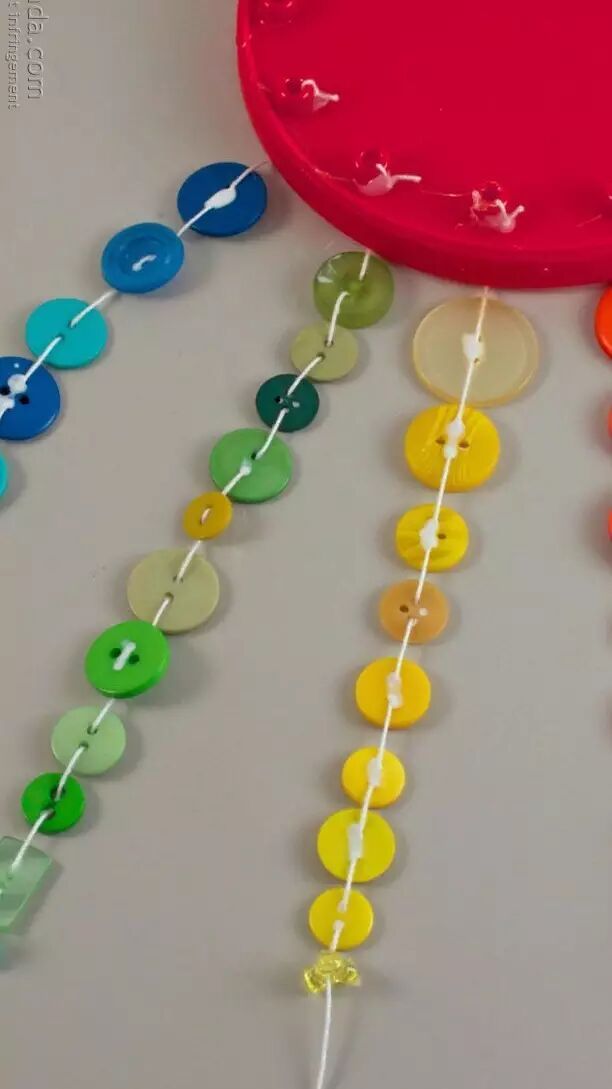
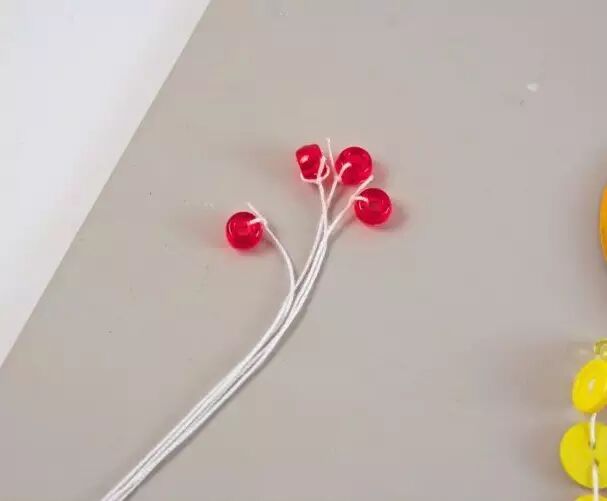
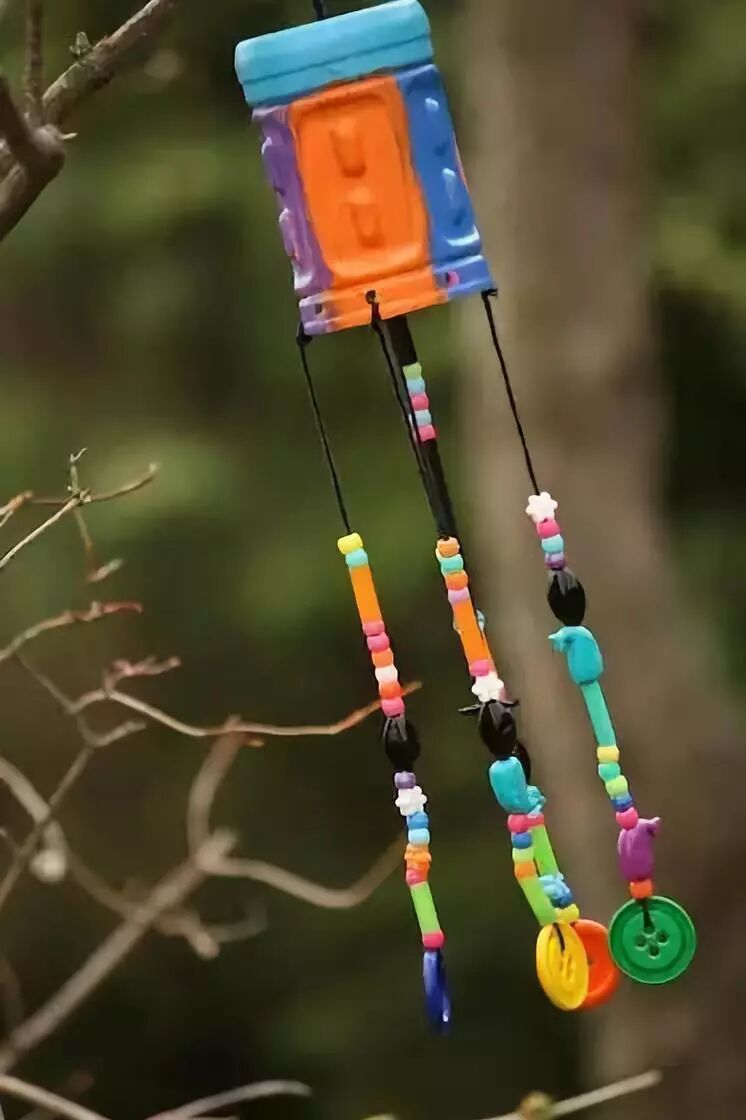
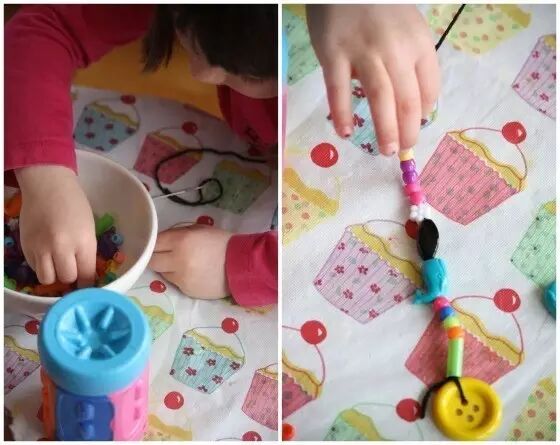
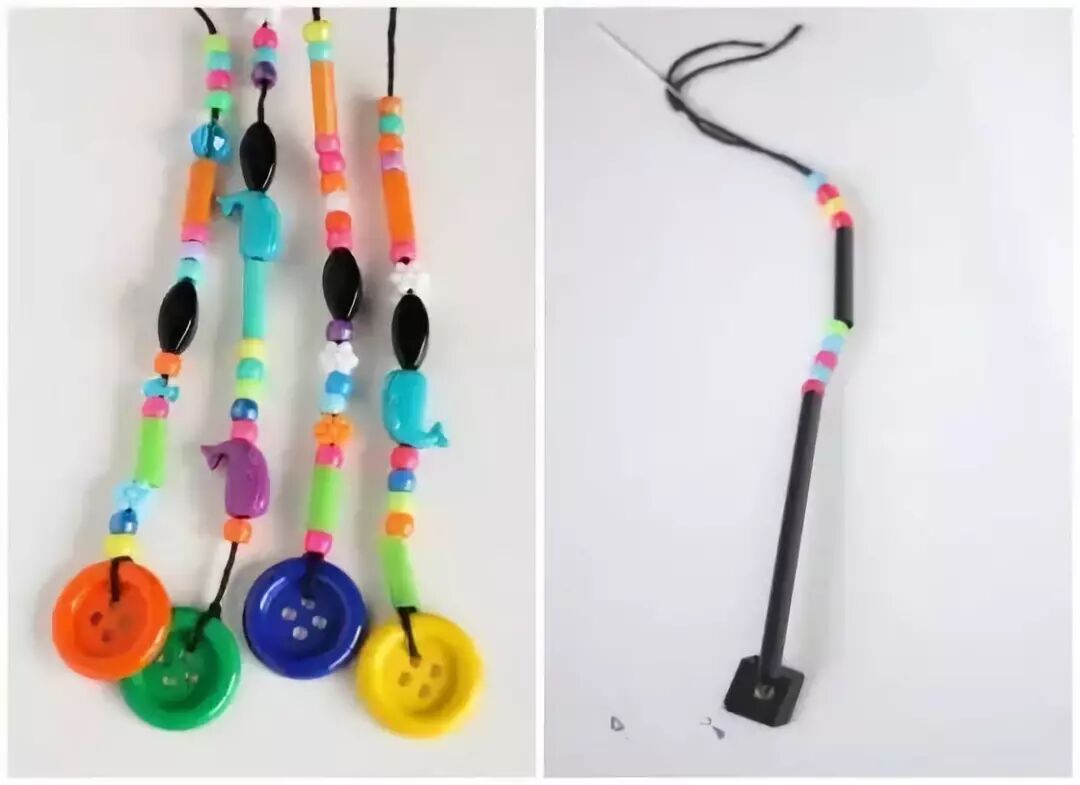
Button Wind Chime
Colorful buttons are definitely great decoration items, but they can also be the main character strung into a beautiful wind chime!
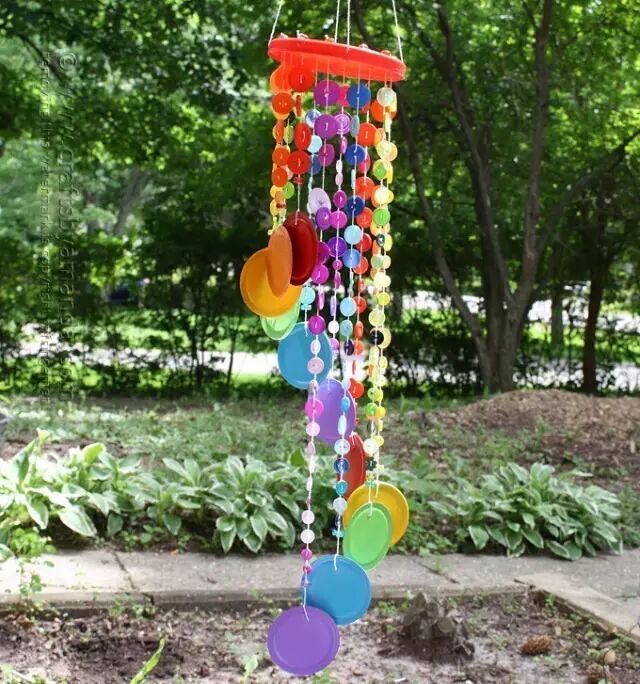
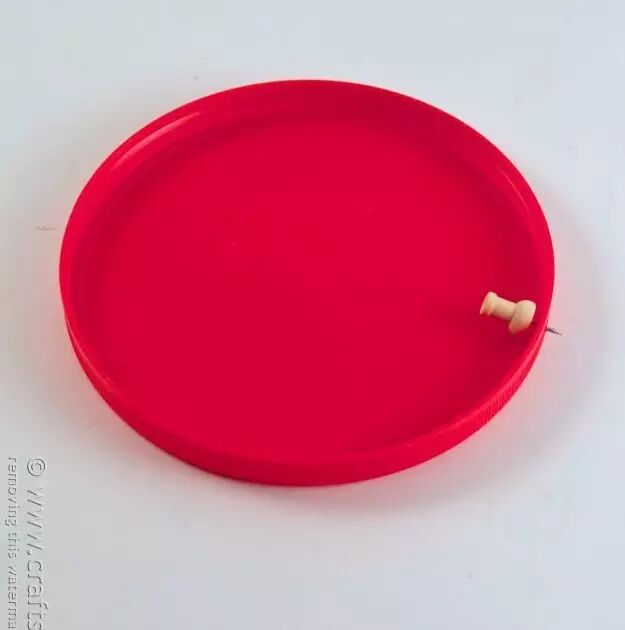
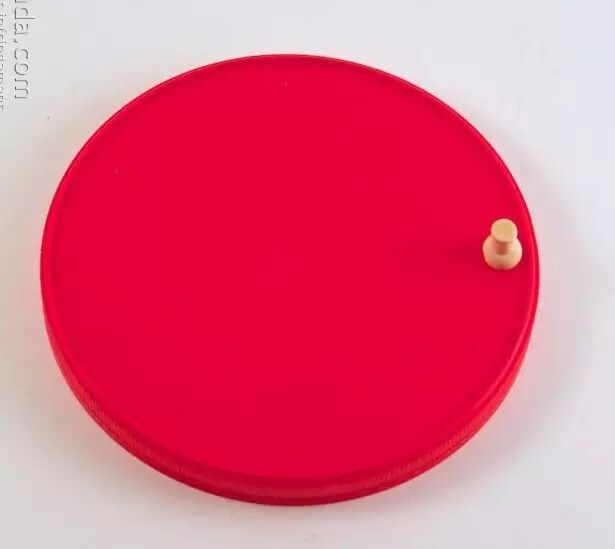
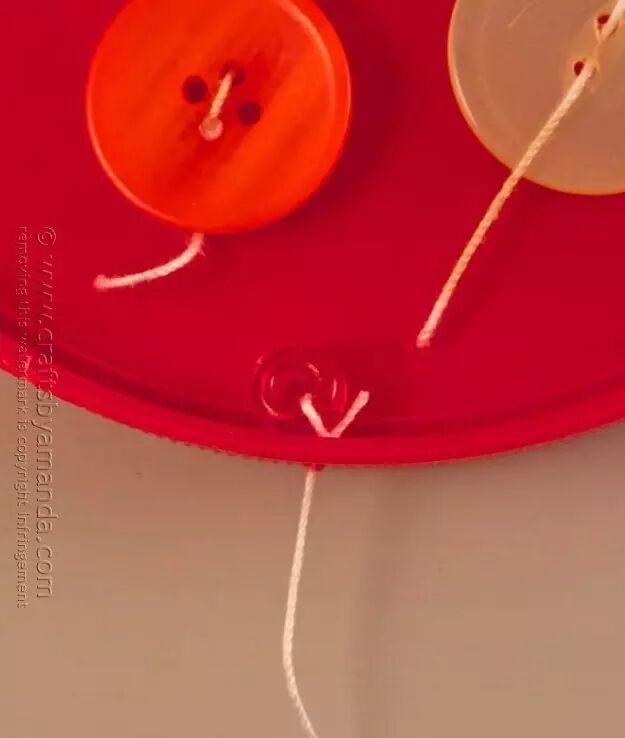
Materials needed: Buttons, string, plastic lid, plastic plate, hole punch
Instructions:
- Use a hole punch or pin to make small holes in the plastic plate
- Make holes in both the front and side of the plastic lid!
- Thread the buttons through the small holes with thin string
- For each string of buttons, it's best to choose the same color family with different shades, and the sizes can be arranged irregularly!
- Thread small beads or plastic plates at the end of the string as decoration
- Making the button strings in increasing阶梯状 lengths can increase the collision between materials and produce more beautiful sounds!

Branch Wind Chime
Children in the city have less contact with nature. At this time, you can take your children to the countryside to experience nature and find good craft materials. Branches are a very good example.

Materials needed: Branches, paint, thin string, metal buttons, hanger
Instructions:
- First, cut the collected branches into similar lengths and paint them with bright colors
- Nail metal buttons to one end of each branch - this step needs Dad and mom's help!
- Finally, hang the metal buttons with thin string and tie them to the hanger. It's recommended to arrange them in color order - it will look even better!
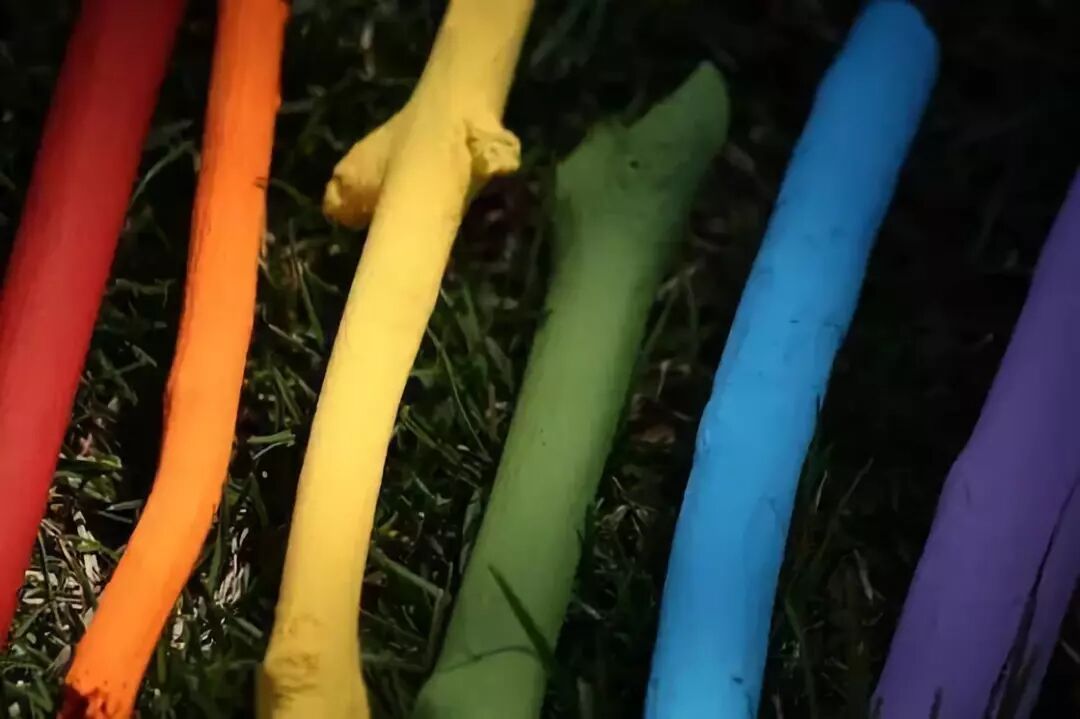
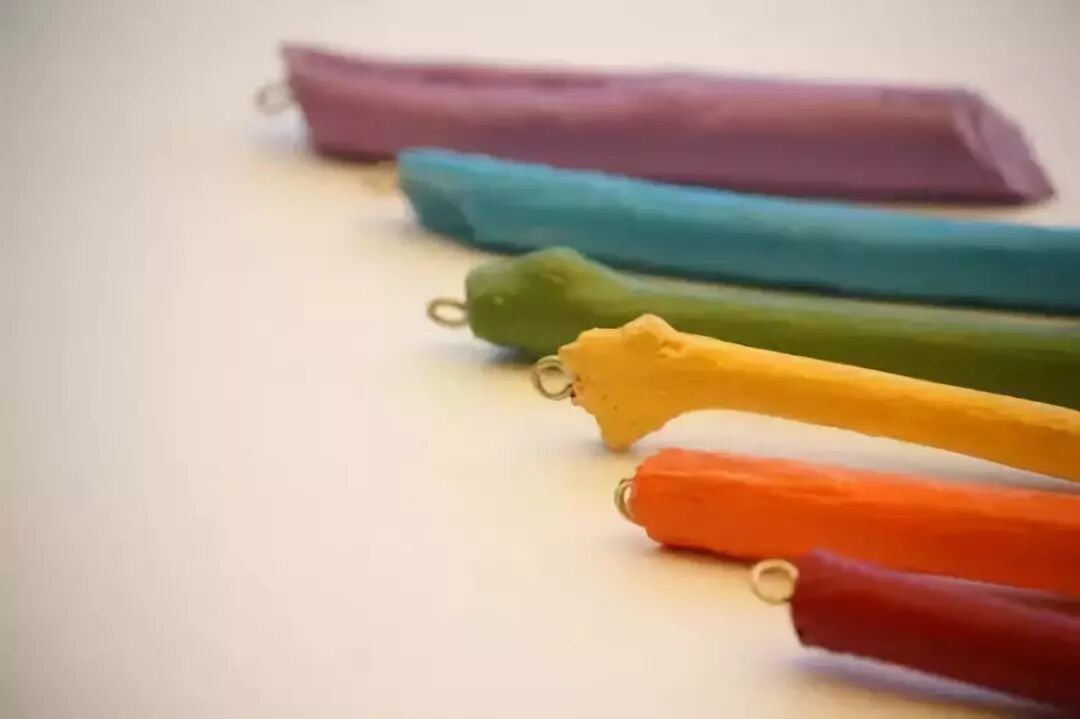
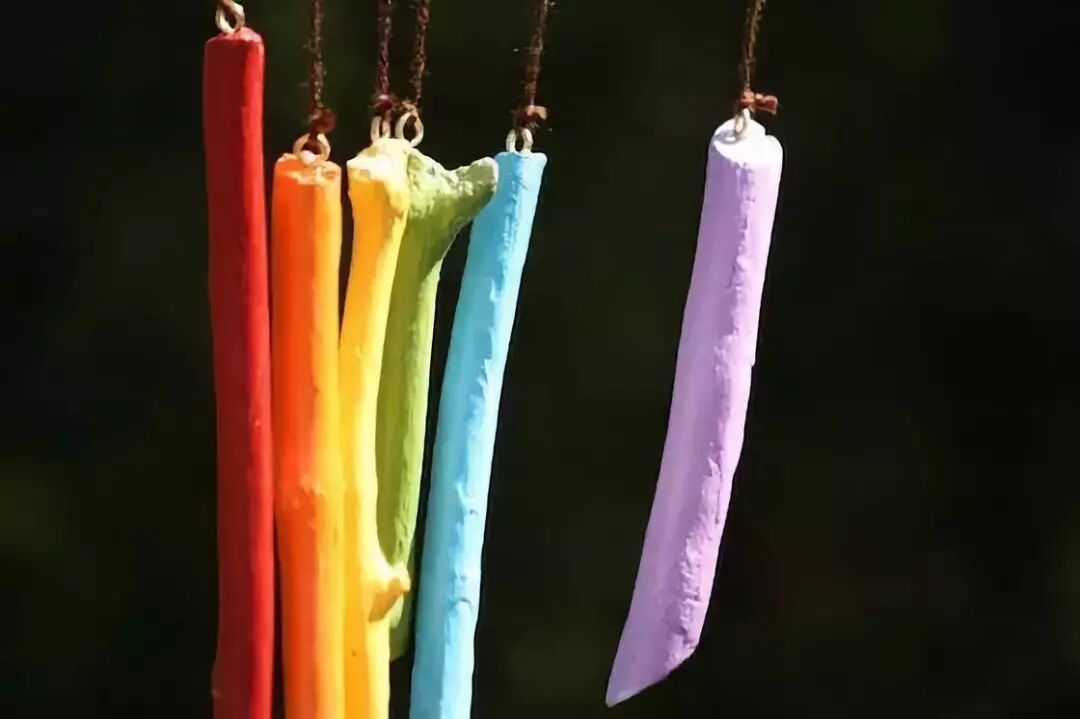
How long haven't we heard the sound of wood colliding? Let's make a branch wind chime together and feel the sound of nature!
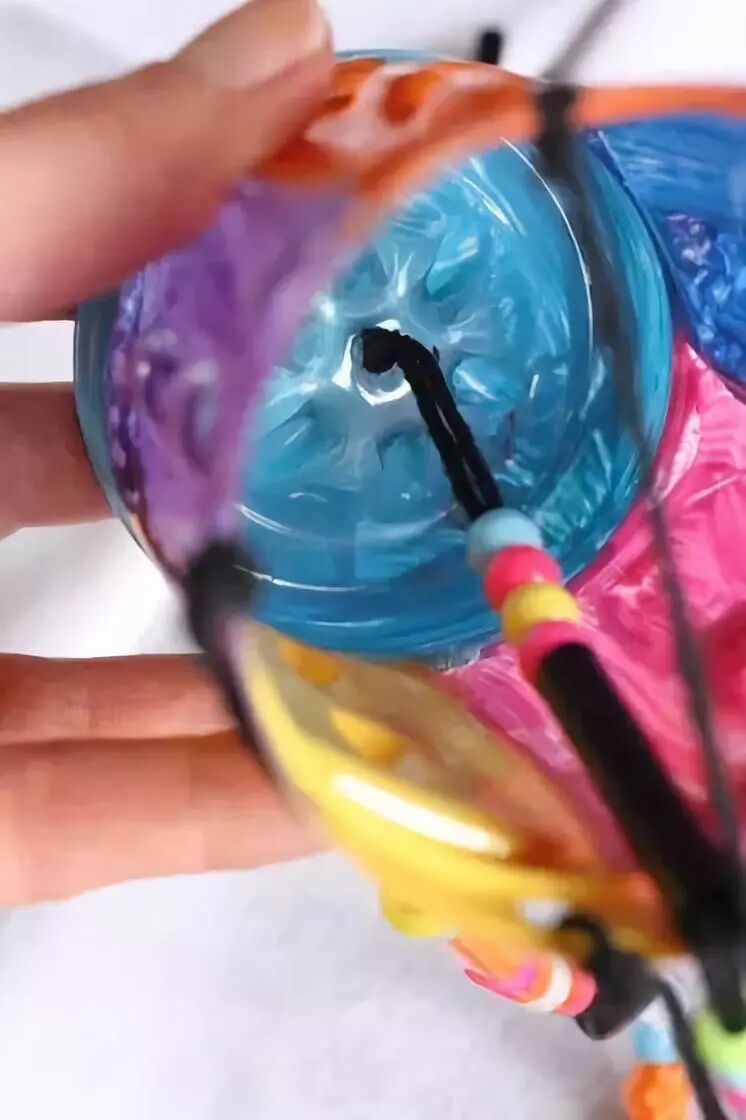
Plastic Bottle Wind Chime
When making small wind chimes, how can we miss my favorite versatile material - plastic bottles?

Materials needed: Small beads, thin string, plastic bottle, paint, hole punch or pin
Instructions:
- First, with the help of your parents, cut the plastic bottle in half, leaving the lower half of the plastic bottle, then paint it with nice colors!
- Thread beads onto thin string - the brighter the colors, the better!
- Make holes at the bottom and opening of the plastic bottle, and thread the beaded string through
- Finally, your plastic wind chime is complete! Turning waste into treasure, contributing to environmental protection, and giving your child a chance to create - I think there's nothing better than this!


Sophia Lee
February 27, 2026 at 2:15 PM
My kids and I made the popsicle stick wind chime together, and it turned out beautiful! The instructions were clear and easy to follow. We loved painting the sticks different colors and arranging them into a star. Now it hangs in our kitchen window and makes such a lovely sound when the breeze comes through. Thank you for this wonderful craft idea!